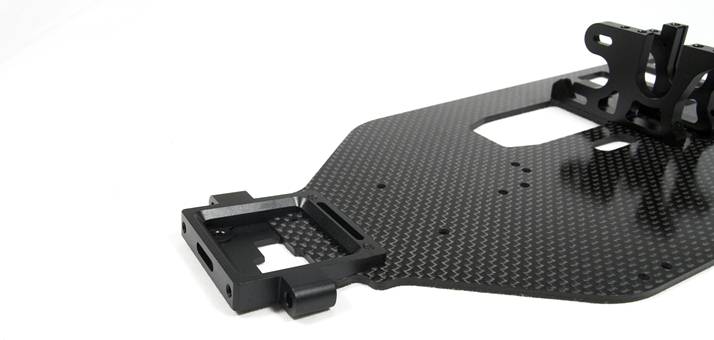
The bottom chassis plate, the two upper plates
(both 2,5mm) and the shock towers (3,5mm) are CNC cut form carbon fiber. I’d
advise that you sand the edges a bit and seal them with superglue. This prevents
the laminate from fraying during offroad-abuse.
When done, the first alloy parts are ready to be mounted according to bag A: The
front bulkhead, the motor mount and the rear suspension blocks.
|
 |
| An overview of all
carbon fiber parts: Sanding and sealing the edges is
mandatory! |
|
 |
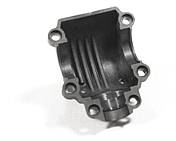
| The nicely crafted
front bulkhead is secured to the chassis with two screws
- metric like any other screw on the Cyclone D4.
The bulkhead features recessed areas to make the gear
boxes sit as low as possible which meets the demand for
a low center of gravity. Additionally, the universal
joints deflect less this way. |
|
 |
Step B - slipper and servo: The slipper construction resembles
that of other shaft driven mid motor 4wds. Built like a ball diff, with slipper
pads instead of the drive rings and balls and lacking the thrust bearing
assembly of said diff, the Cyclone D4’s torque limiter is neither adjustable
from the outside, nor able to limit the torque for the front end and the rear
end independently.
The manual calls for the slipper to be completely locked and the unlocked for a
quarter of a turn. I’d strongly advise that you check this setting and adjust,
if necessary as soon as you hit the track. Thread lock is mandatory on the screw
that holds the whole slipper together. It prevents accidental loosening.
Afterwards, the servo finds its way into the D4’s slowly growing chassis. This
is quite astounding, given the fact that most other manufacturers let you add
the servo right before the finish. Hot Bodies decided to take the easier way,
providing a hassle-free installation with no parts in the way. Several servo
mounts and arms are included for an optimal adaptation of any brand.
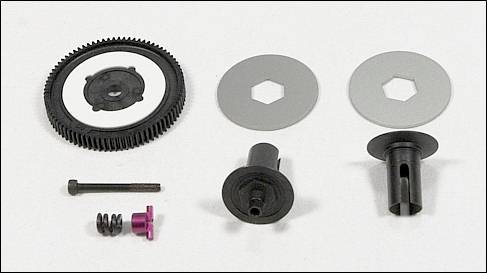
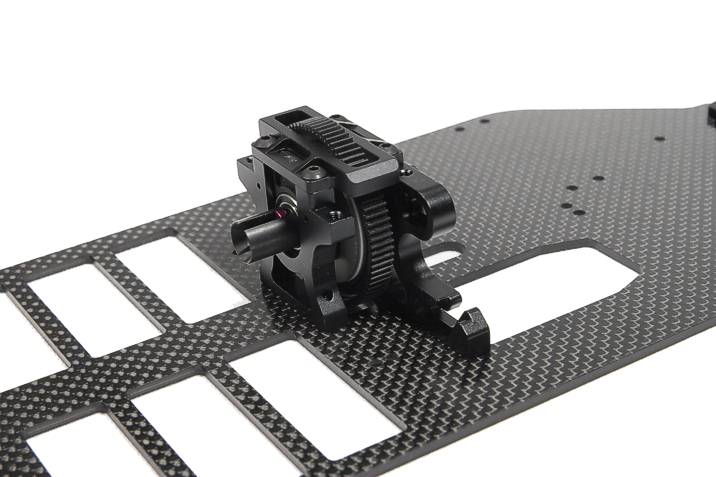
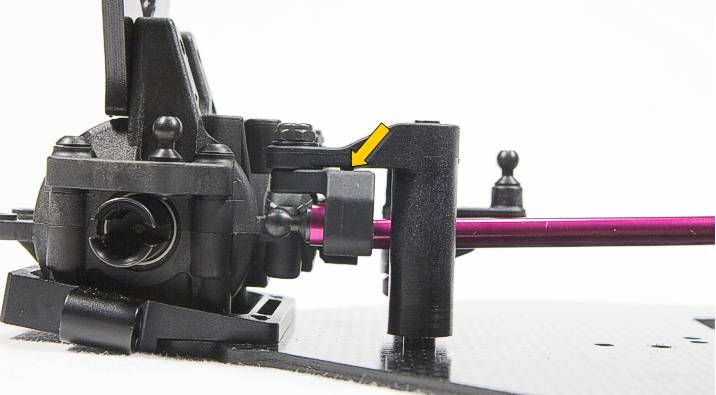
The Cyclone D4's
slipper construction loosely resembles that of a ball
dif.
Due to the square-cut interlocking protrusion and a
missing thrust bearing, the slipper is neither
adjustable from the outside, nor able to limit the
torque for the front end and the rear end independently.
In order to set the slipper, only the four screws of
the top plate have to be removed whicht means quick
access to the slipper. (see the picture below) |
 |
|
 |
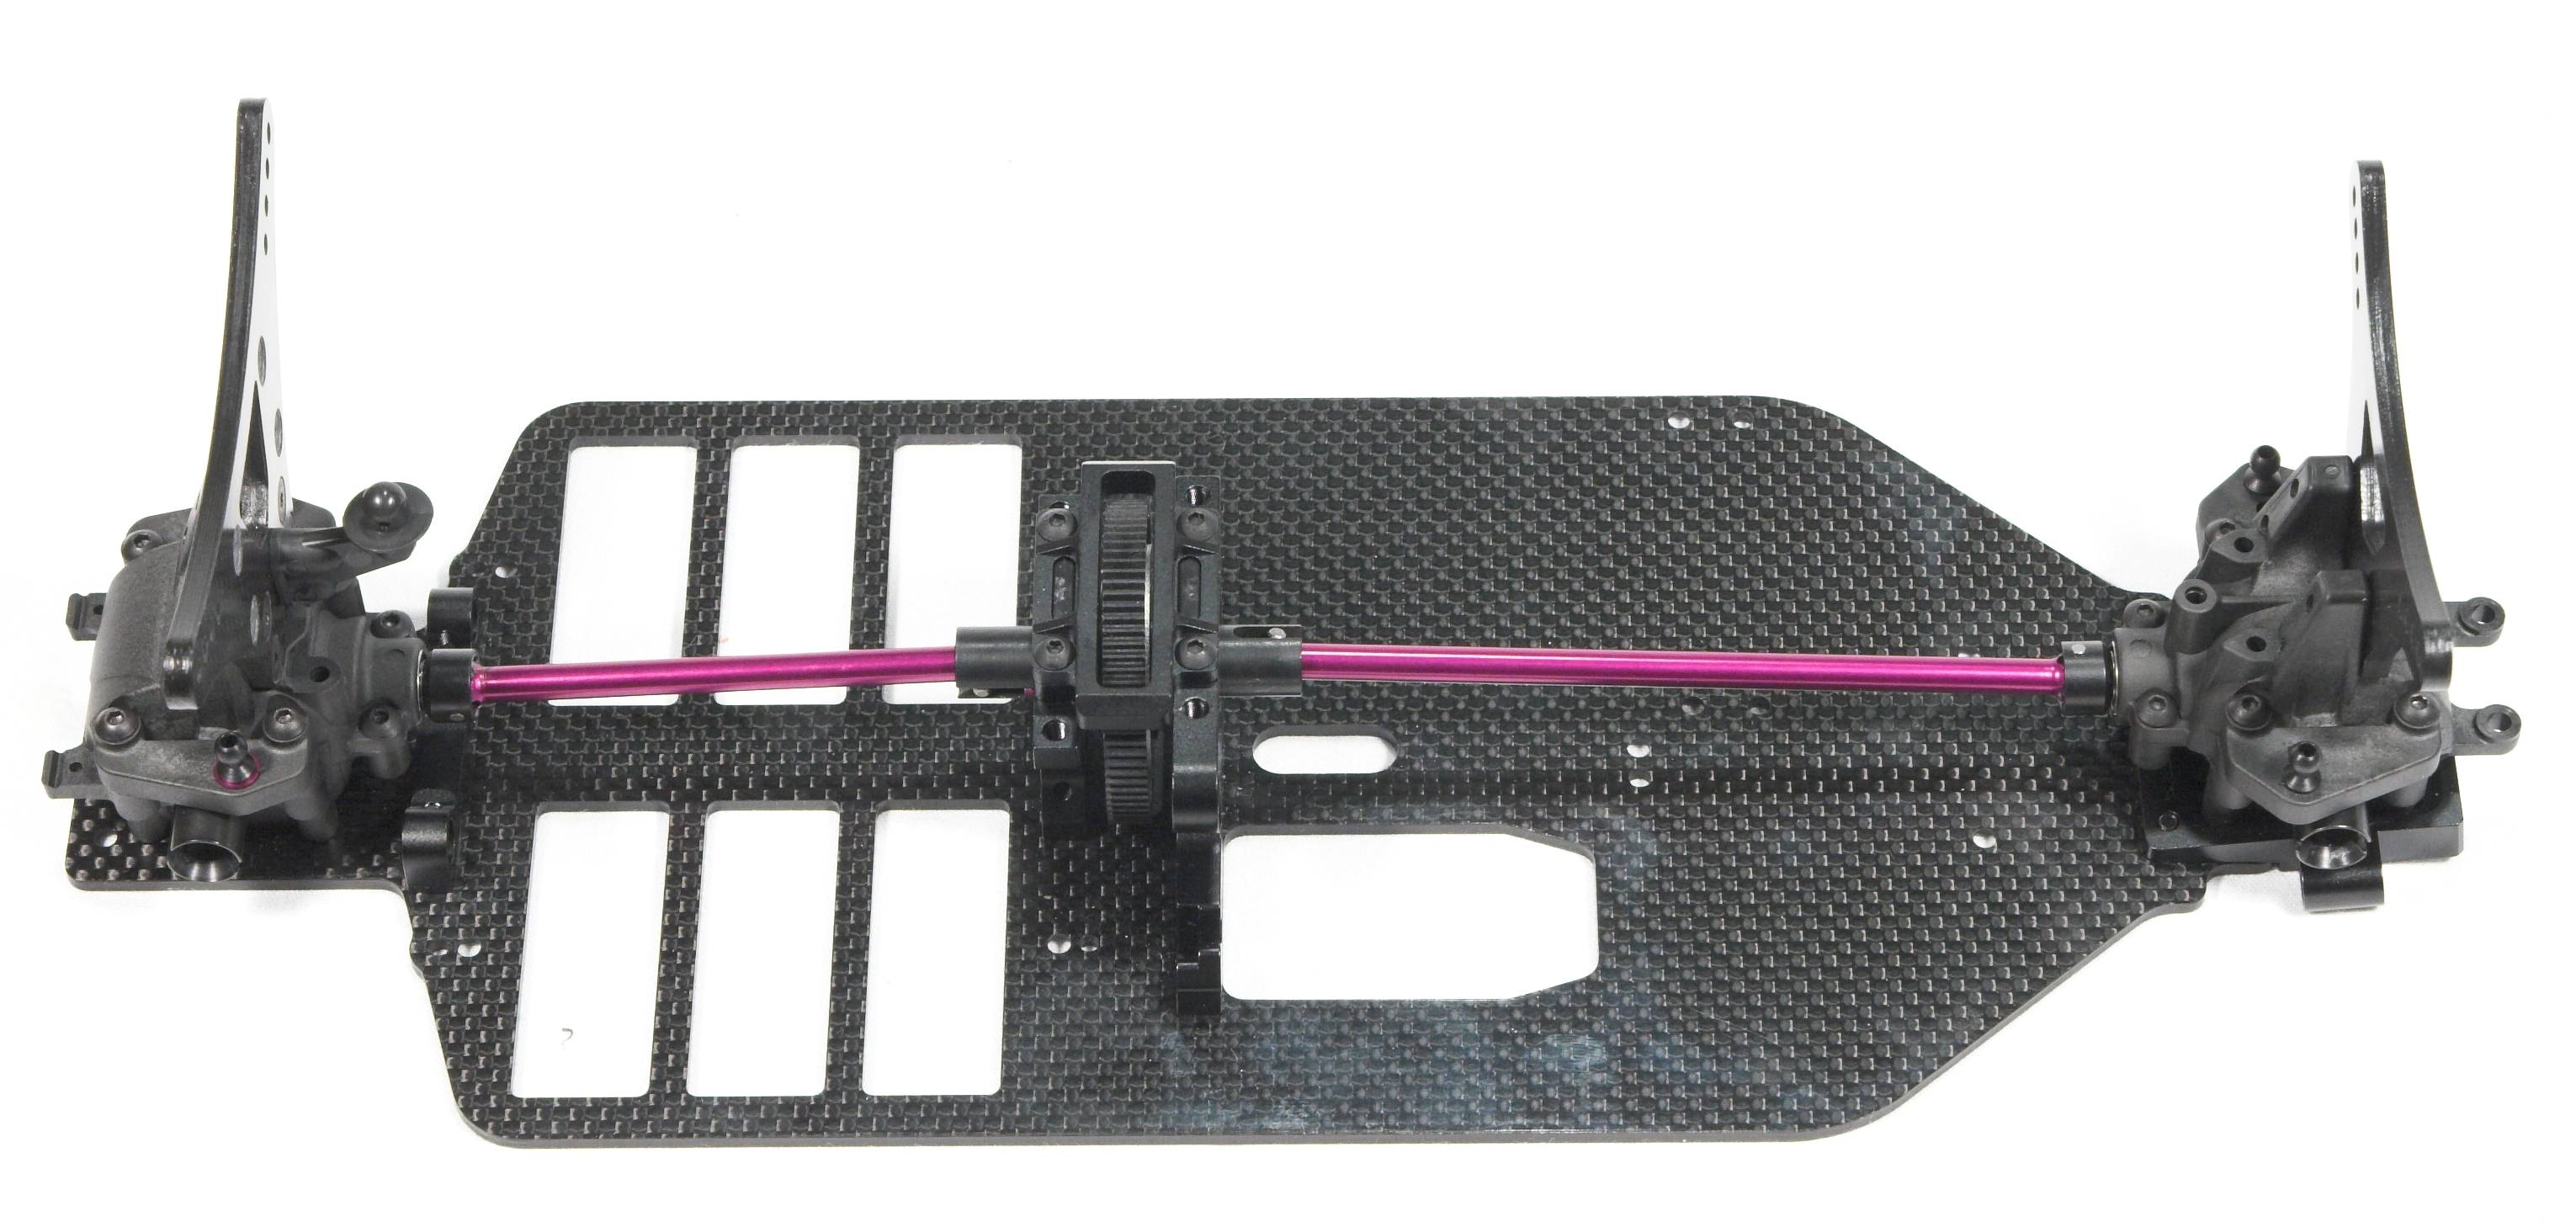
Step C - ball diffs and center shafts: Building the center
universal shafts was a breeze. Everything went together just fine. Only the grub
screw, which secures the universal joint, is a bit difficult to reach.
Be sure to add thread lock as the instructions tell, but abandon the supplied
grease. Grease and dust from the track make up a good grinding paste, so the
universals would wear out fast.
The ball diffs are identically built for both ends. You should clean all ball
diff parts with brake cleaner, since they are covered with an oily residue to
prevent corrosion.
In the first days of the Cyclone D4’s release, the ball diffs got a bit infamous
for their weak 2mm screw that would not hold up to its task. It works fine for
me (more on that in the second part) but Hot Bodies quickly updated the new kits
with a 2,5mm hex screw.
Speaking of the screw head, the slotted head of the 2mm screw is a bit awkward
to hold with a screw driver, hence putting the two diff halves together may be a
bit tricky.
To overcome this, simply stick a piece of paper towel into the outdrives, so the
inner assembly can’t fall off when you put one half beside.
The assembly is completed by setting the correct tension on the diff screw: You
should not or hardly be able to turn the crown gear as you lock both outdrives
(with scissors or allen wrenches). Generally speaking, the front diff should be
a little bit more locked than the rear diff, so that you feel more resistance
turning an outdrive while holding the crown gear.
Remember to readjust the diff setting after a few minutes of track time, since
the parts break in and loosen up a little.
 |
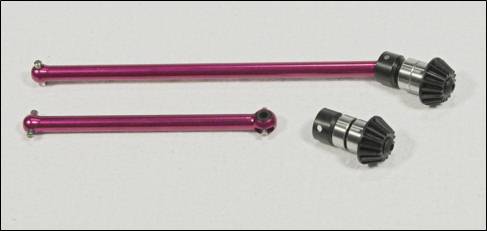 |
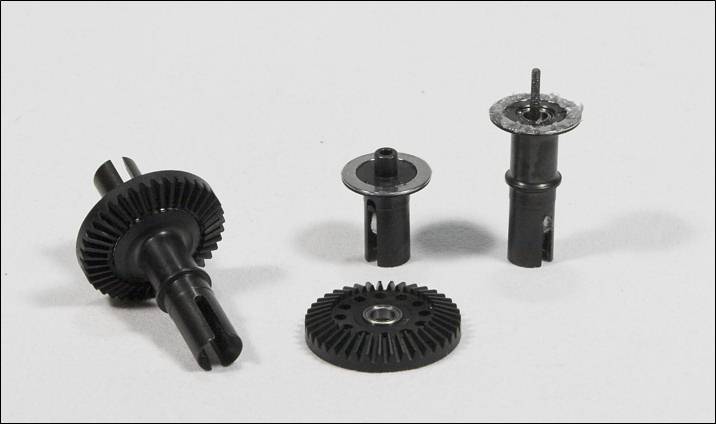
The ball diffs are
identically built for both ends.
Crown and pinion gears leave quite a sturdy impression.
The power distribution to both ends is carried out with
the help of alloy universal joints that are directly
joined to the pinion gear shafts. |
Step D - drive train, shock towers and steering: As soon as the
diffs and center joints are completed, the gear boxes can be finished. A little
addendum states, that it’s possible for the crown gear to hit the upper gearbox
cover and hence some sanding may be needed. This however was not the case with
our review sample, as the gear spun pretty smooth with the box closed.
Shimming the gears is vital to the performance and durability of the drive
train. A gear mesh between the crown and pinion gear, which is too loose will
quickly wear them down. Setting the mesh too tight creates unnecessary strain on
the motor. However, with plastic gears it is always recommended to set the gear
mesh a little bit on the tight side with only a minimal amount of play. Hot
Bodies therefore includes some shims, though it wouldn’t hurt if they’d include
some more.
 |
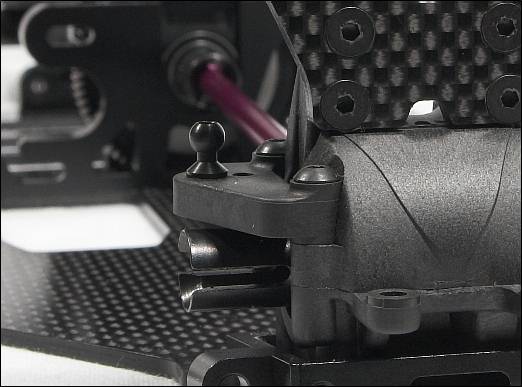
Speaking of the correct gear mesh: The upper gearbox has additional
bracing molded on the inside opposite to the shock tower mounts.
This is a nice idea since it gives the gearbox additional strength
and keeps the gears perfectly align even if the shock towers face
high loads.
Another thing that makes sure the gears stay aligned properly are
small pins and recessed areas around the screw holes that key the
parts together. |
|
 |
As soon as the gear boxes are sealed, the shock
towers are ready to mount.
The ball studs which carry the upper camber lonks are attached to seperate
blocks which are themselves secured to the gear box with two screws.
Like with the gearbox-halves, pins and recesses key the involved parts togehter
and take the load from the threads. |
 |
|
(Click on the picture for
an enlarged view!) |
|
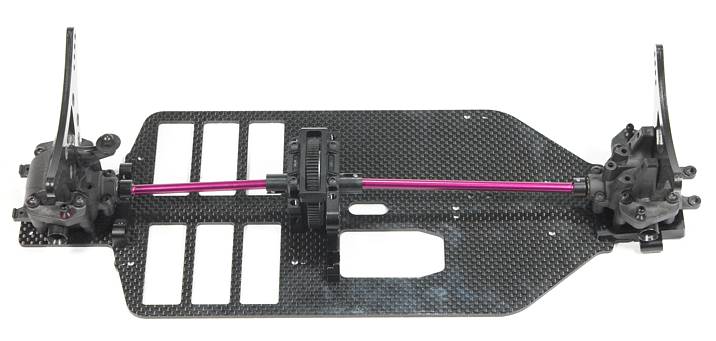
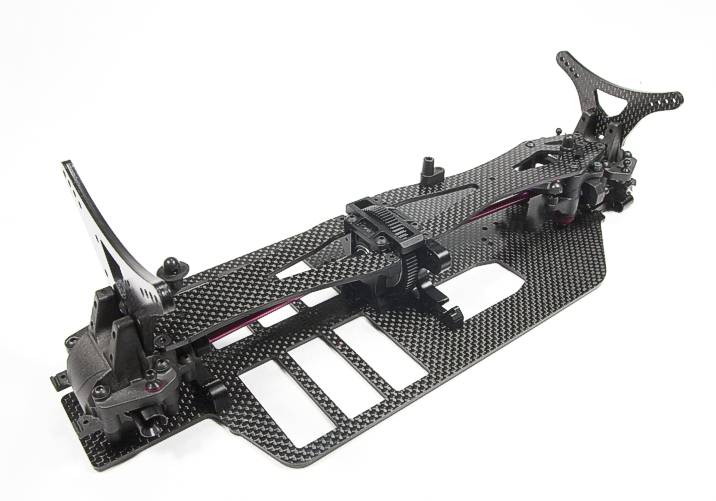
Slowly, the individual
parts begin to form a handsome offroad-chassis
... |
I’m especially fond of the Cyclone D4’s steering system, which is sturdy and
almost free of any backlash. You should be aware though, not to tighten the
screws too much as this will bind the steering. Little pegs on the steering arms
tilt the steering plate a bit and preload the bearings which takes out any play.
 |
|
As soon as the two upper plates join
the gearboxes with the center mount, Step D is completed and we can
move on to the Cyclone D4’s suspension. |
|
(Click on the picture for
an enlarged view!)
|
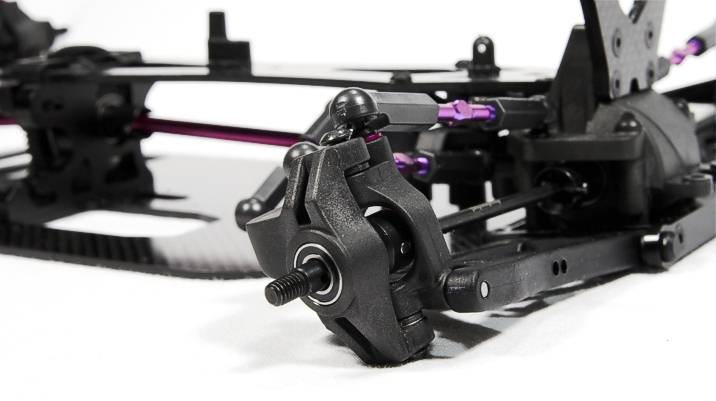
Step E - the front suspension: The layout of the front
suspension loosely resembles the current crop of 4wd buggies. It’s a new take on
the classic Losi suspension, where the wider steering knuckle clamps the c-hub.
But with Hot Bodies’ racer, the kingpins are threaded into the c-hubs instead of
the steering knuckles. The concept creates a bigger bearing surface, but on the
other hand, it creates higher loads on the threads. With alloy c-hubs, this
would be the better choice, but with plastics involved, I like Team Losi's idea
better.
It’s a good choice from Hot Bodies, to drop the dreaded suspension e-clips in
favor of grub screws and suspension pins with a flat section for the screw to
hold onto. But there’s a risk in confusing the 3x3mm grub screws reserved for
the suspension with the 3x2,5mm screws for the universal joints. I did! So let’s
put it this way: the silver screws go into the c-hubs and the black screws
secure the universal joints.
The front bulkhead gets plastic inserts to avoid wear. Putting everything
together was easy and noting had to be trimmed or shimmed. The front arms have
very little play and move freely up and down.
The kit includes in interesting tool to make building the camber links easier:
your trusty 4-way wrench is equipped with a plastic insert that captures the
ball end. You don’t have to use your universal pliers here - no risk scratching
or damaging the ball cups!Step F -
the rear suspension: A conspicuous number of shims get to use as we move on
to the rear suspension. Not only that, but they come in various sizes, 5mm and
6mm in diameter with a thickness of 0,5mm, 0,75mm and 1mm. This may result in a
multitude of setup options, but distinguishing and arranging them is not really
fun - to put it in a polite way.
Like with the front suspension, the out hinge pins are secured with silver grub
screws. The inner hinge pins again rest in plastic inserts to prevent wear on
the nicely crafted alloy suspension blocks.
|
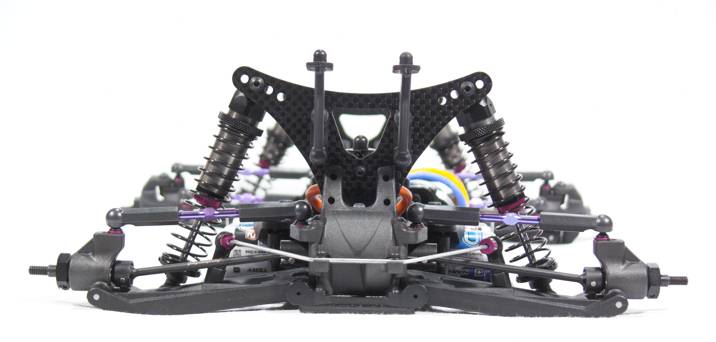 |
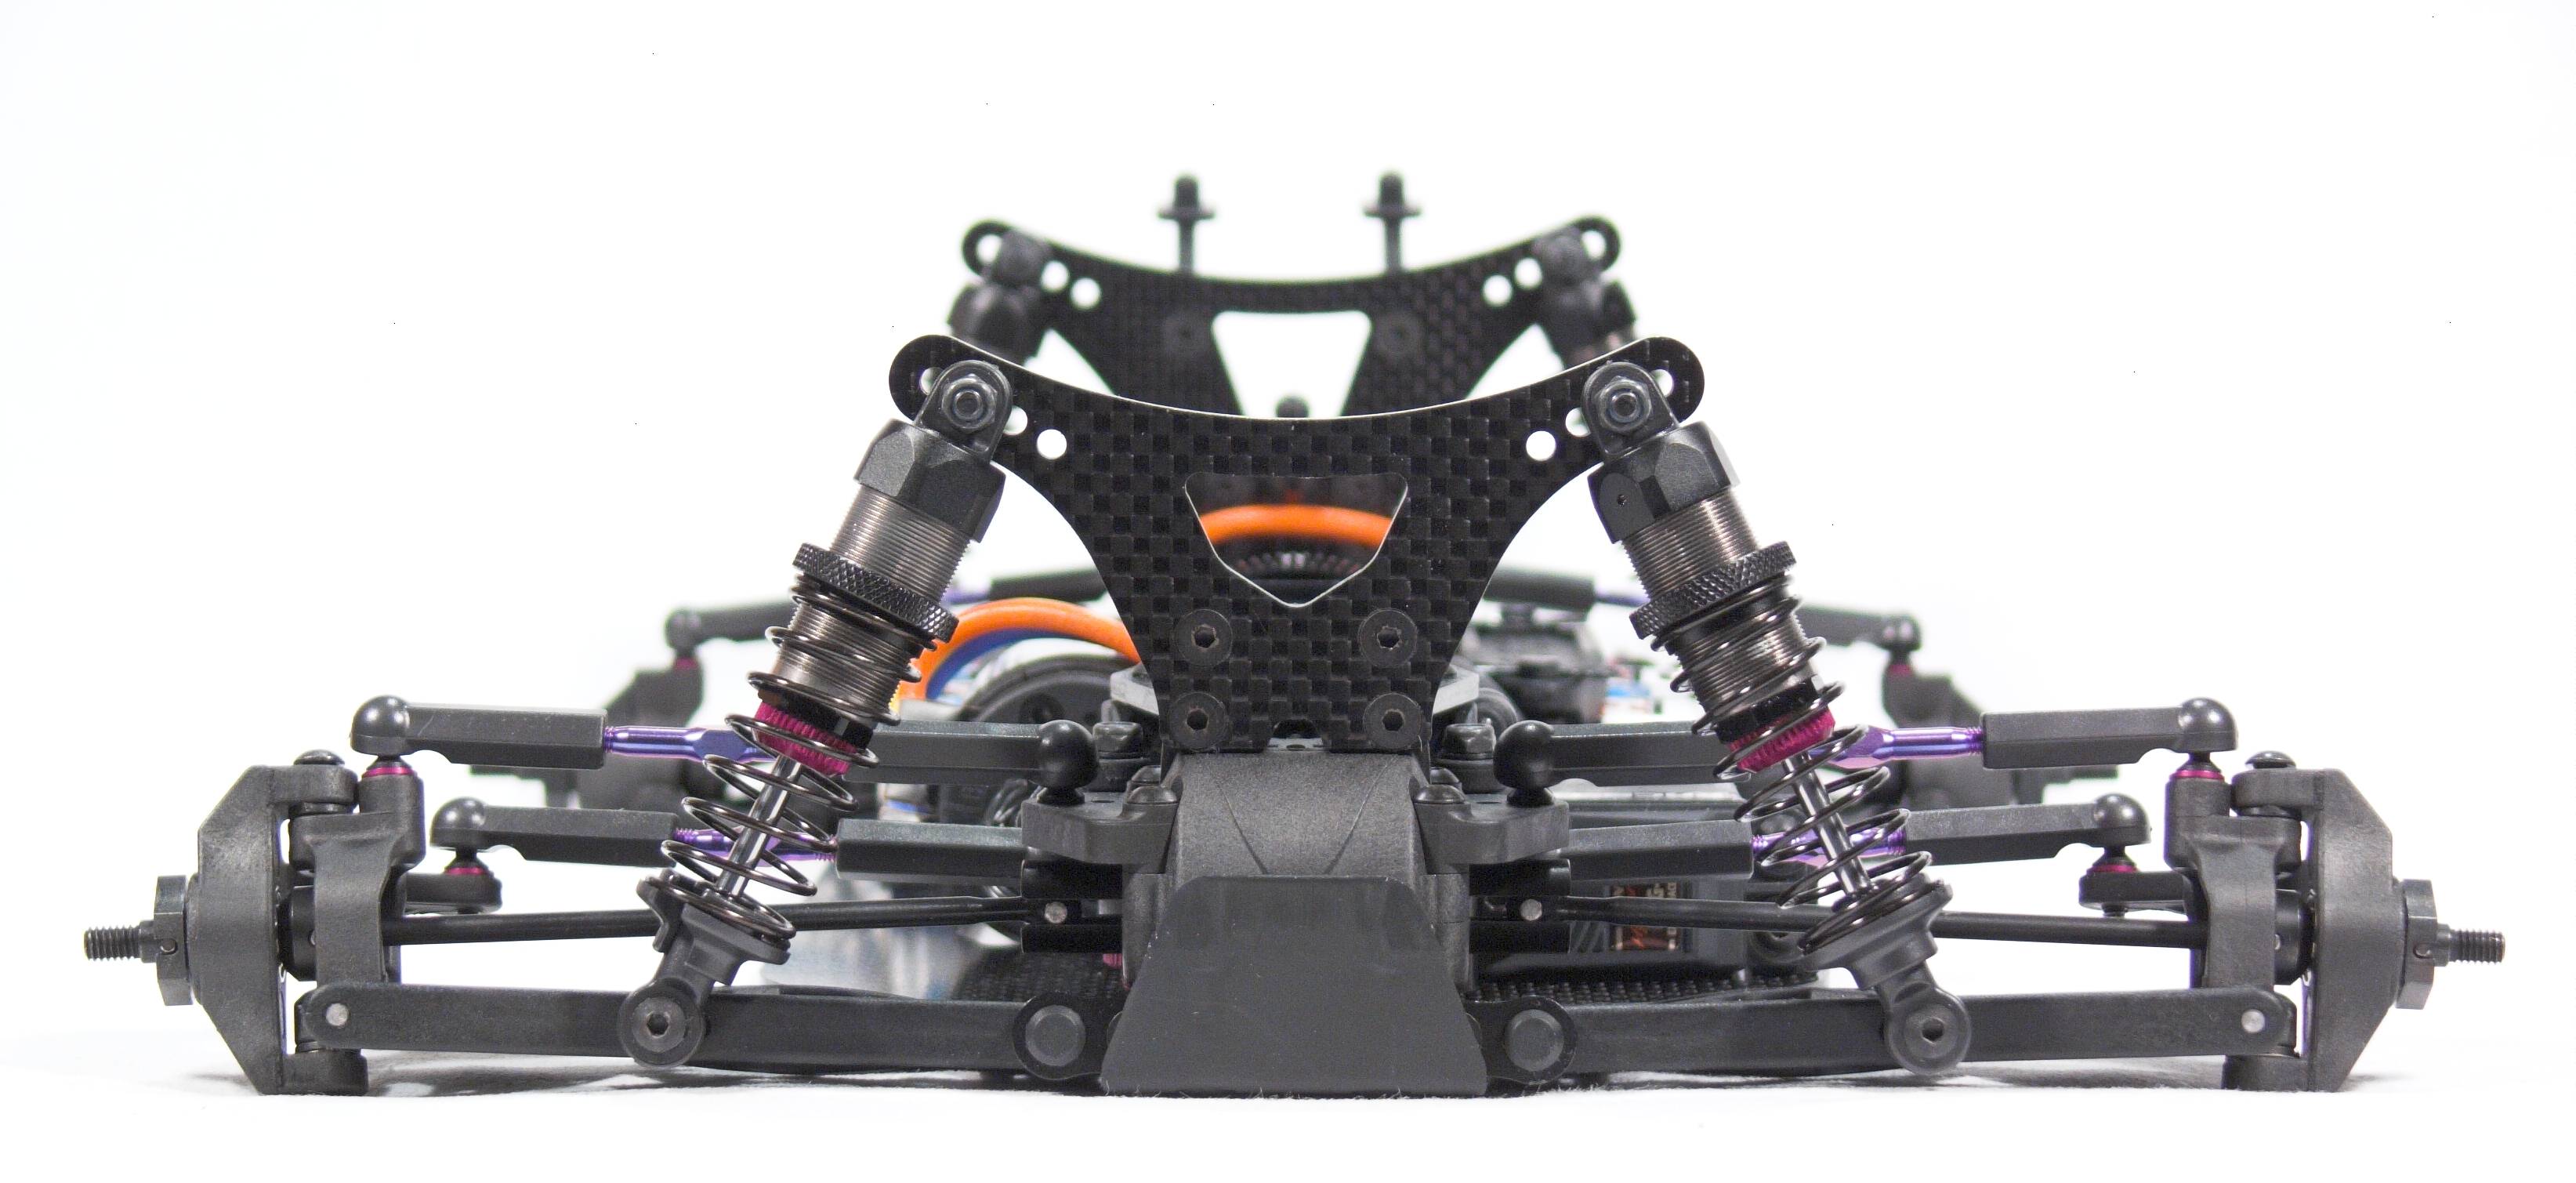
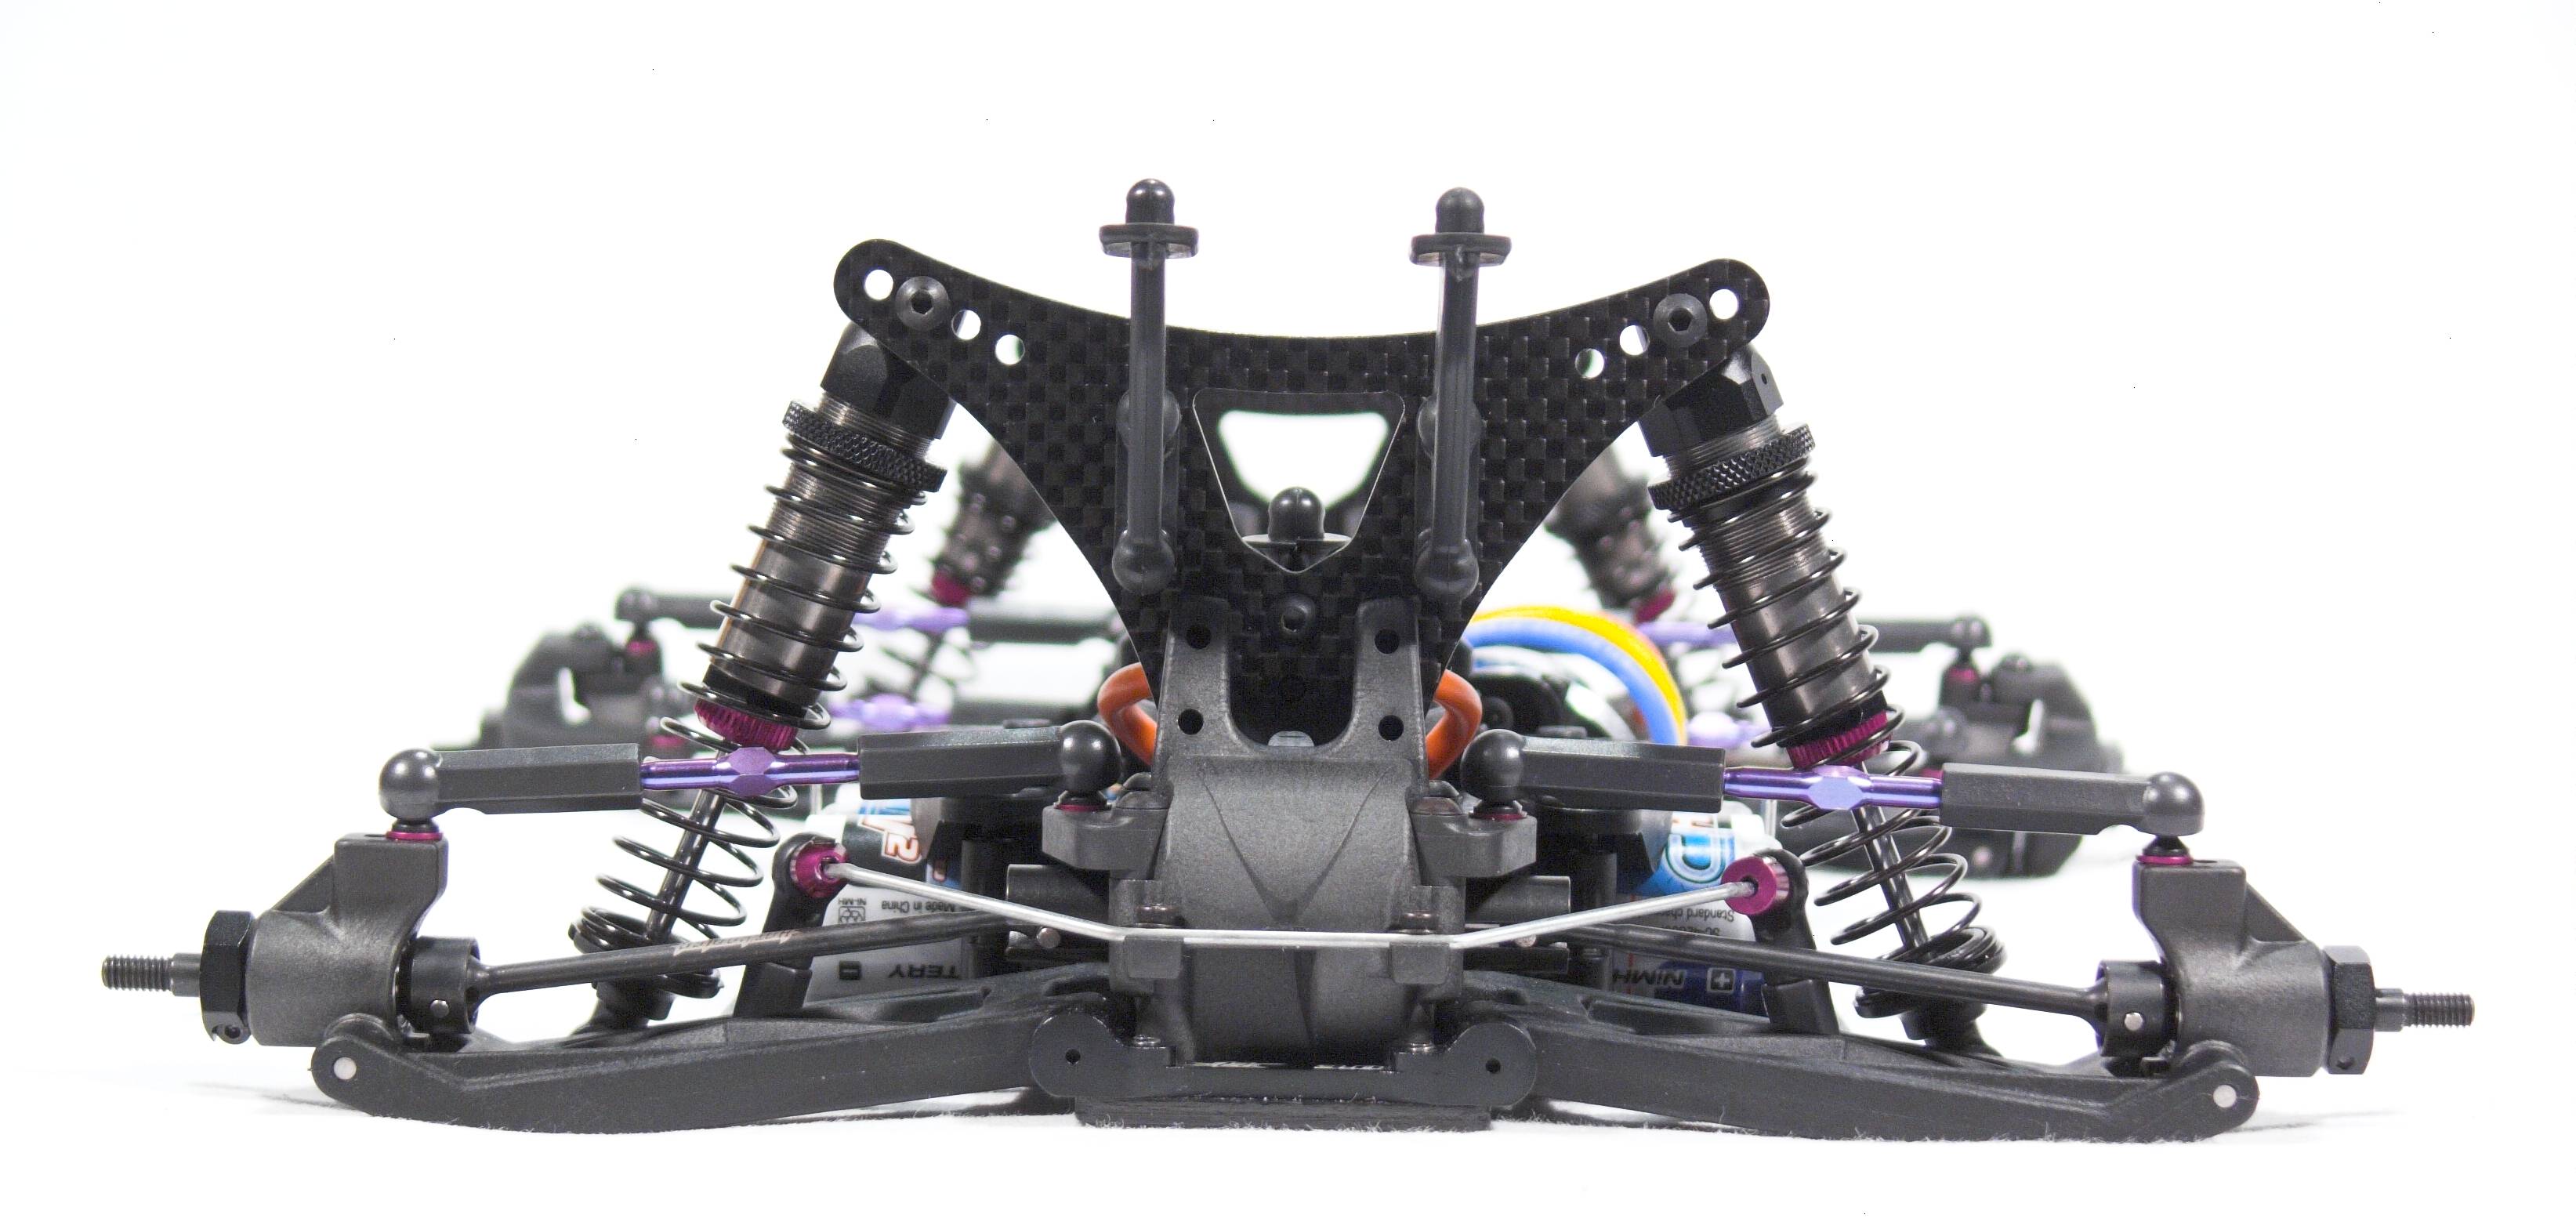
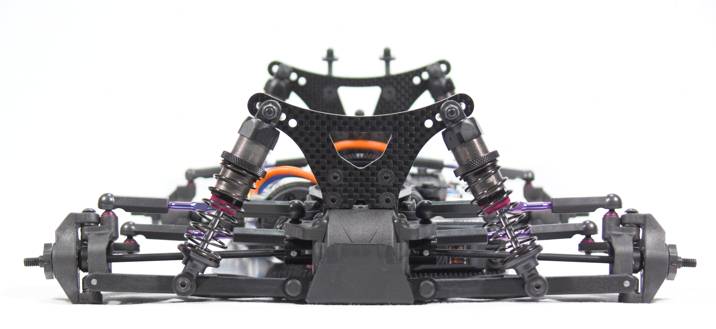
| Front and rear end
for comparison -
to simplify matters, the shocks are also attached,
though I'll cover their build in the next paragraph.
(Click on the pictures to see an enlarged view) |
The kit includes an anti-roll bar for the rear end. It is again secured with a
grub screw that should be tightened slowly until the anti-roll bar can only move
a little.Step G and H - the shock
absorbers: The Cyclone D4’s shocks are made from alloy and feature a three
piece design similar to Kyoshos latest 4wd and 2wd racing buggies. To make
building the shocks easy, the appropriate tool is included.
The spring preload which controls the ground clearance is adjusted with a
knurled nut. The o-rings are easily accessible thanks to a threaded end cap on
the sealing cartridge. The upper shock cap features a thin o-ring and should be
mounted very carefully.
|
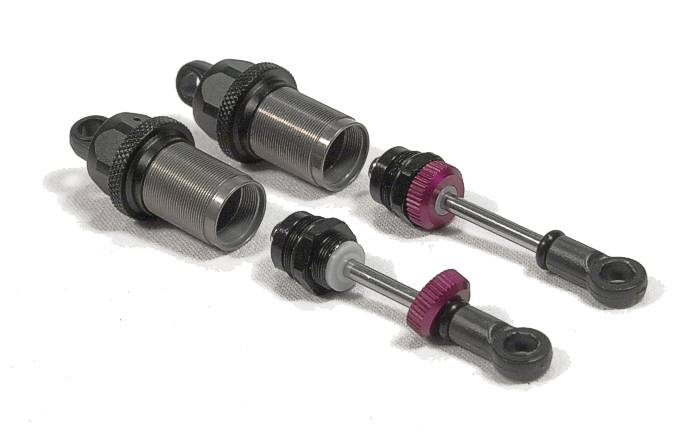 |
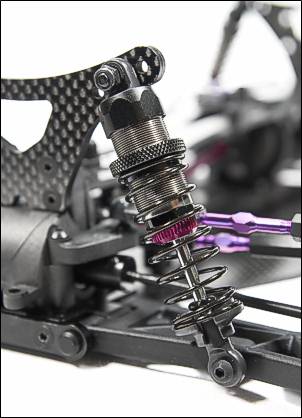
| The picture above
makes the three-piece design obvious. The purple
colored knurled nut offers quick access to the shocks' o
rings which are covered with a white plastic tube that
doubles as a guide for the shock shaft. |
| |
Speaking of the internals, the shock shaft has two
threaded ends, so the shock piston is not secured with e-clips, but with a nut
instead, which makes setup-changes in this department easier. The shocks are
filled from below without any problems, just like any shock loosely based on
Team Losi’s design. A small cut in the sidewall of the alloy cartridge
simplifies bleeding the excessive oil.
The shocks’ standard kit-setup should prove itself in the following test runs.
It’s a worthy base for further fine-tuning.
Let's use the remaining space for some criticism:
The kit did not include silicone oil for the shocks. It would have been nice if
Hot Bodies included at least a bottle of 30wt which the manual calls for, as a
base setup! |
 |
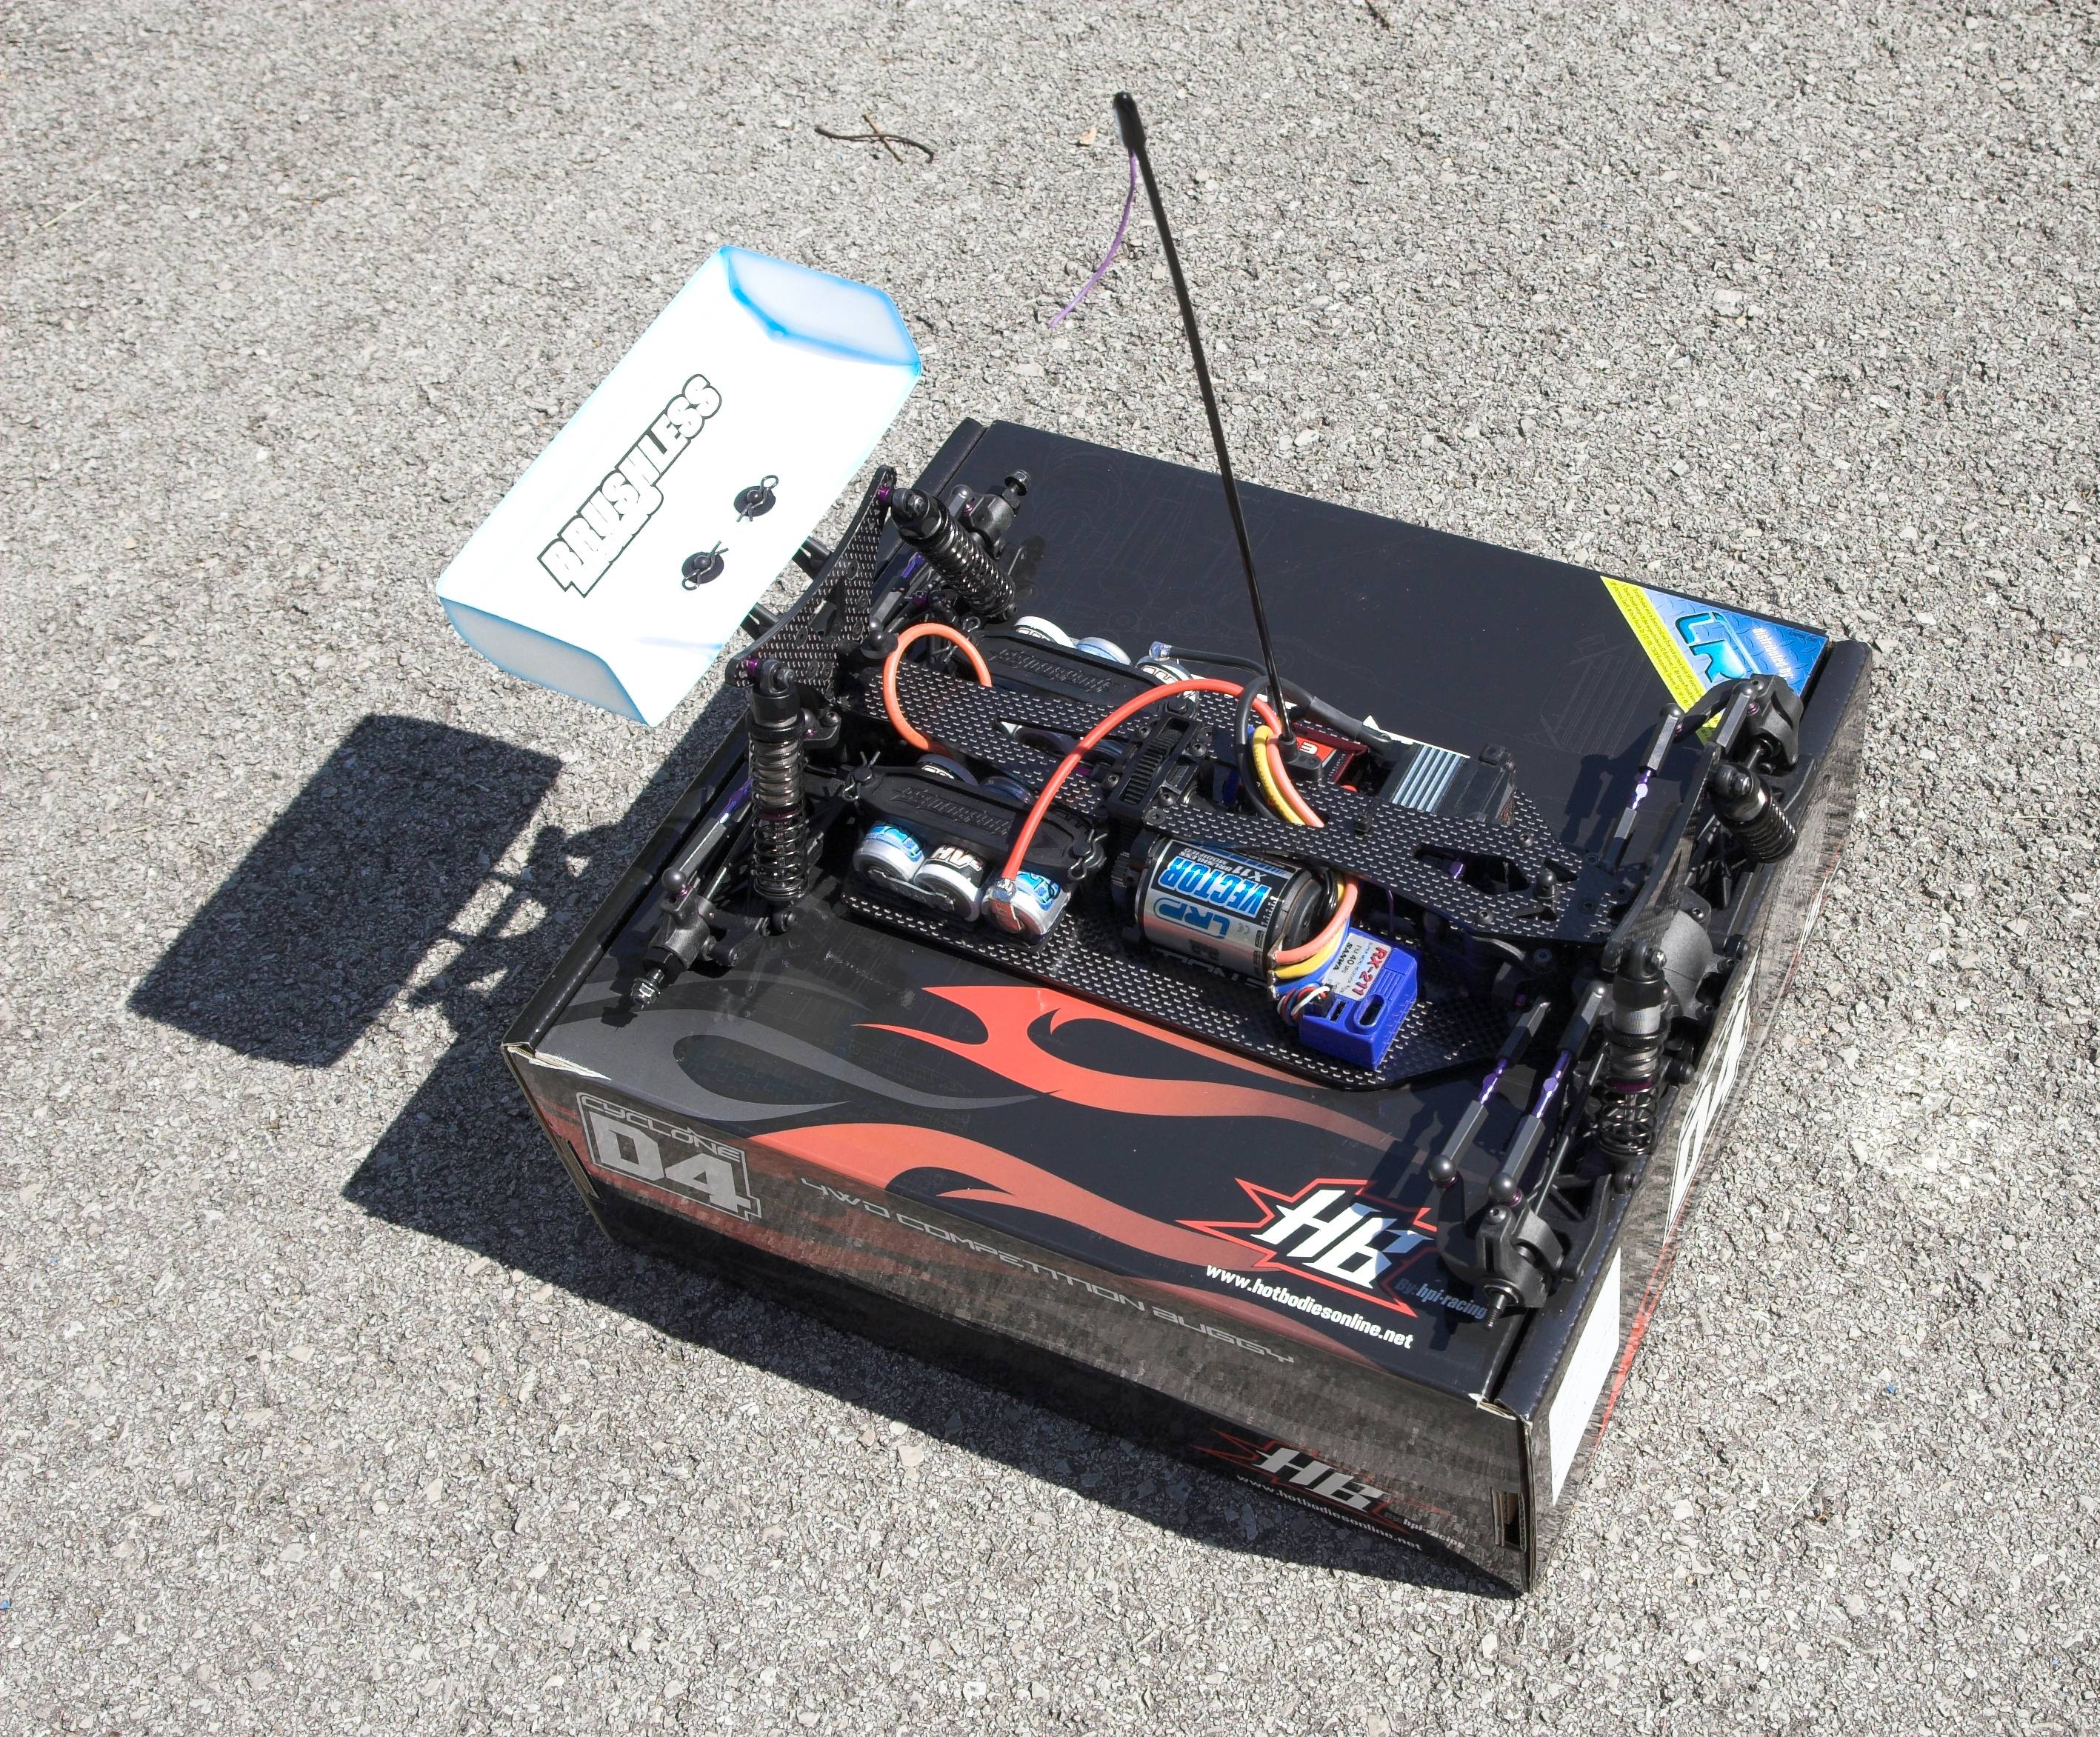
Step I - the finish line: As we’ve attached the servo really
early in the build, only the Rx, Esc and motor remain. The Cyclone D4’s chassis
is really slim, so I stuck the Rx on the motor side to make room for the
typically larger brushless-controller.
Due to the wide cutouts in the chassis plate, the batteries can be mounted in
two different positions thus giving some room to adjust the chassis balance.
12mm hex rims are included in the kit. Mounting standard Losi-wheels is no
problem. You’ll only need the original Team Losi hex adapter, or Hot Bodies’
version with the part no. 61499.
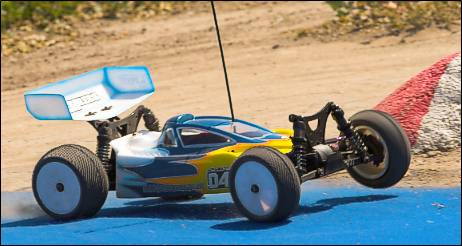
After cutting and painting the polycarbonate body, under tray and both front and
rear wings, we’re ready for the first roll-out!
|