|
» deutsche Fassung:
hier klicken! |
|
|
|
|
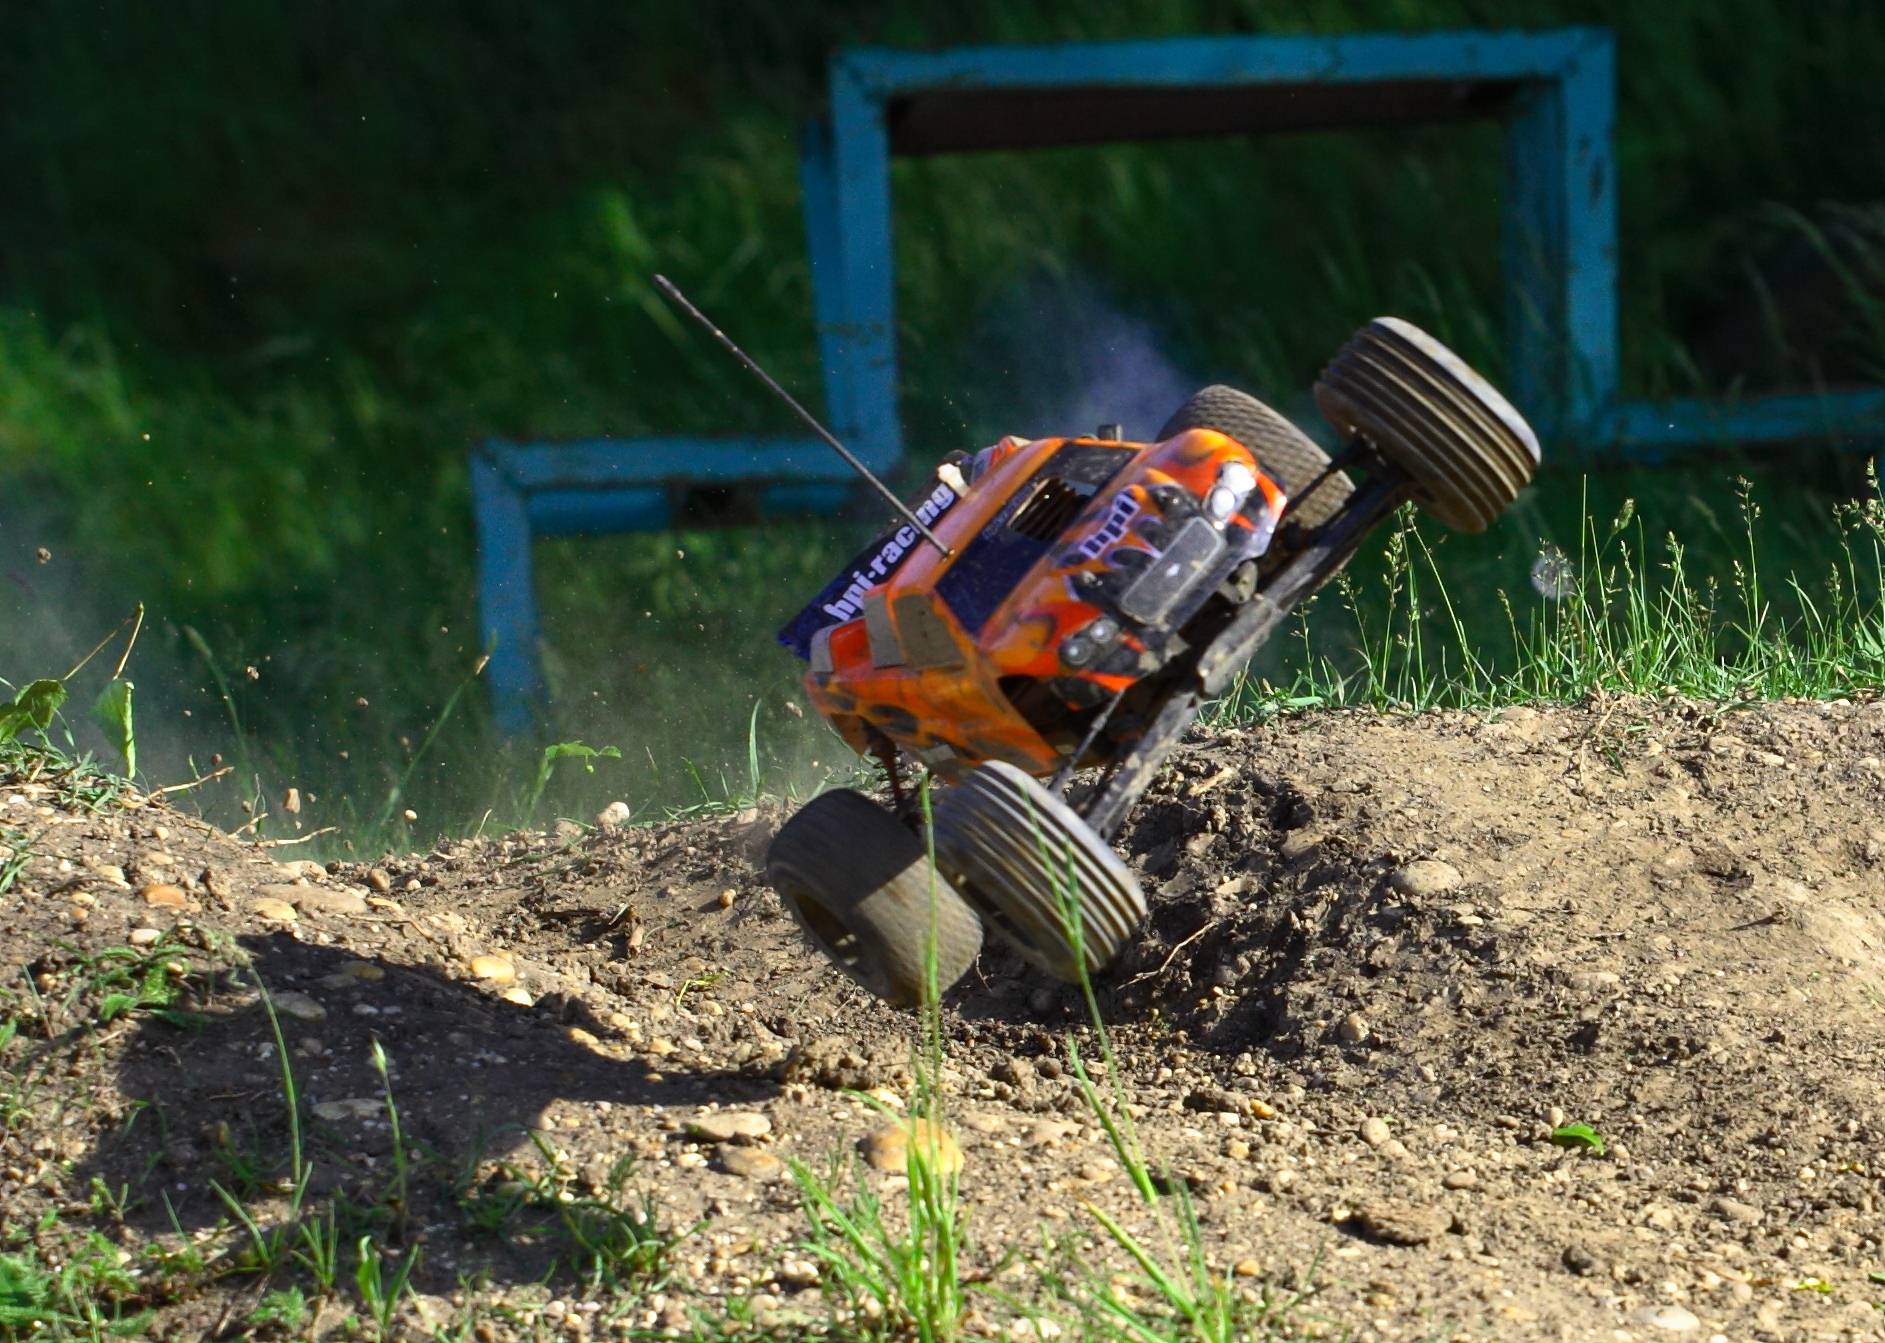
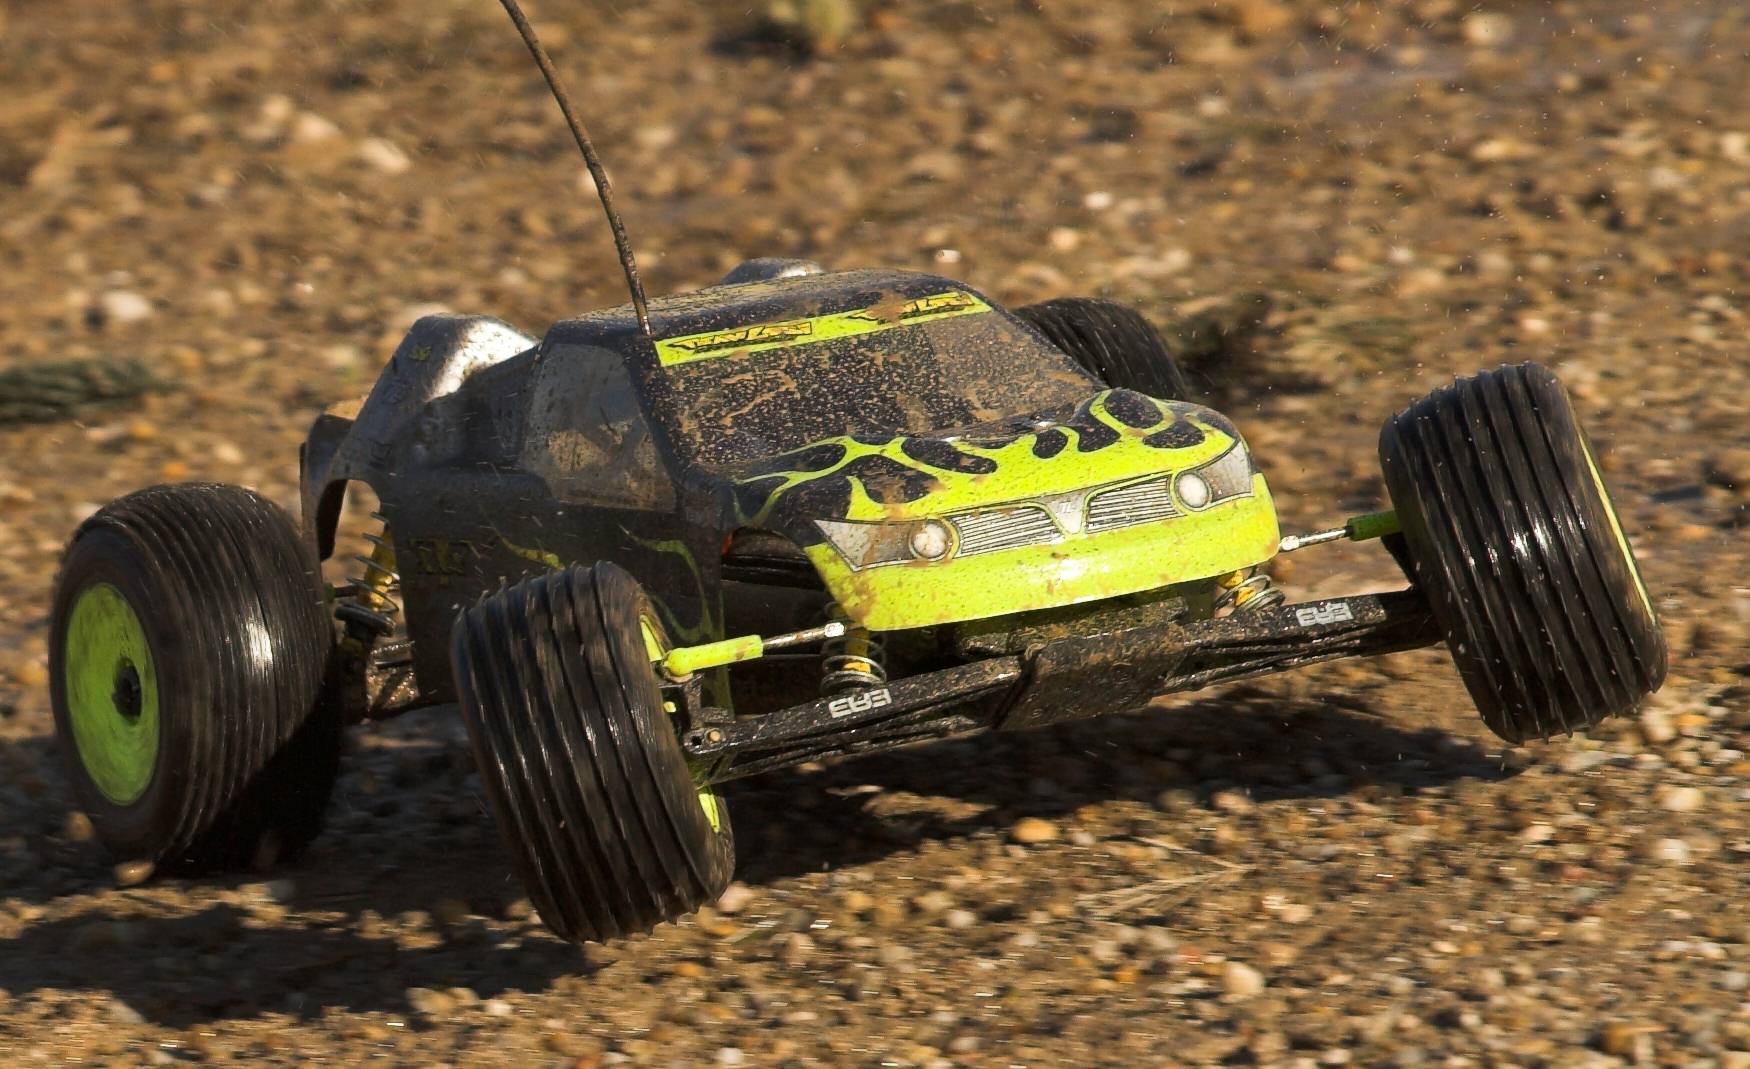
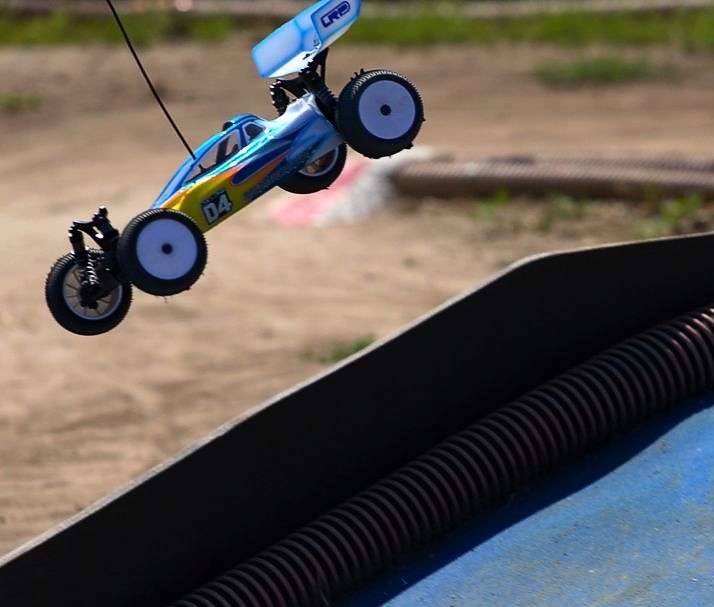
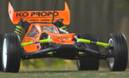
RC-offroading
and action photography |
|
|
|
Seriously, what else did you
expect? ;-)
About a year ago, since I first
made up my mind about an interesting and motivating guide to
beginners' rc-car photography, I had never expected, that the
resulting article would attract so many visitors:
"Photoshooting! Your RC-Car: Spectacularily Staged!" was far
from a "very special interest aritcle" but by all means
nothing short of a full blown success with more than 10000 readers
during the last twelve months - ranking among the Top10 of
offroad-CULT's articles.
So it's more than obvious: The
show must go on! Once again, it's all about rc-offroaders,
cameras and how we can use them for outstanding results. But as the
first photoshooting tutorial focussed more on digital fixed lens
cameras, this time, the tool of choice is a different animal. It's
the digital single reflex camera (DSLR)!
DSLRs, their features and
differences compared to fixed lens cameras are best described in
Wikipedia's DSLR article, gained tremendous popularity in
the last few months. Besides clever marketing on behalf of the
cameras' manufactorers, this can be attributed to the ever sagging
prices of the camera bodies, which made them feasible to the
enthusiastic amateur.
Fixed lens cameras on the other hand, tried to appeal even more to
the "point and shooters" but in raw technological terms, they didn't
evolve much over the last two years or so. (face/smile/whatever
detection - you get what I mean?)
So the serious hobby photographers had nothing left but to catch on
the DSLR-train.
And this is, where the DIRTY ARTS
special joins in: It's all for the ambitious amateur who is aware of
the photographic basics and brings them to use with his recently -
or soon-to-be - bought DSLR camera. For those, who lack the practice
in photographic bascis and basic terms, there's always
offroad-CULT's
Photoshooting 1-3. And of course, there are many many forums
specialised in digital photography out there - so it's your choice!
(But never forget to the knowledge into your photographic
experience!)
All external hyperlinks marked
like this will be
opened in a new browser window!
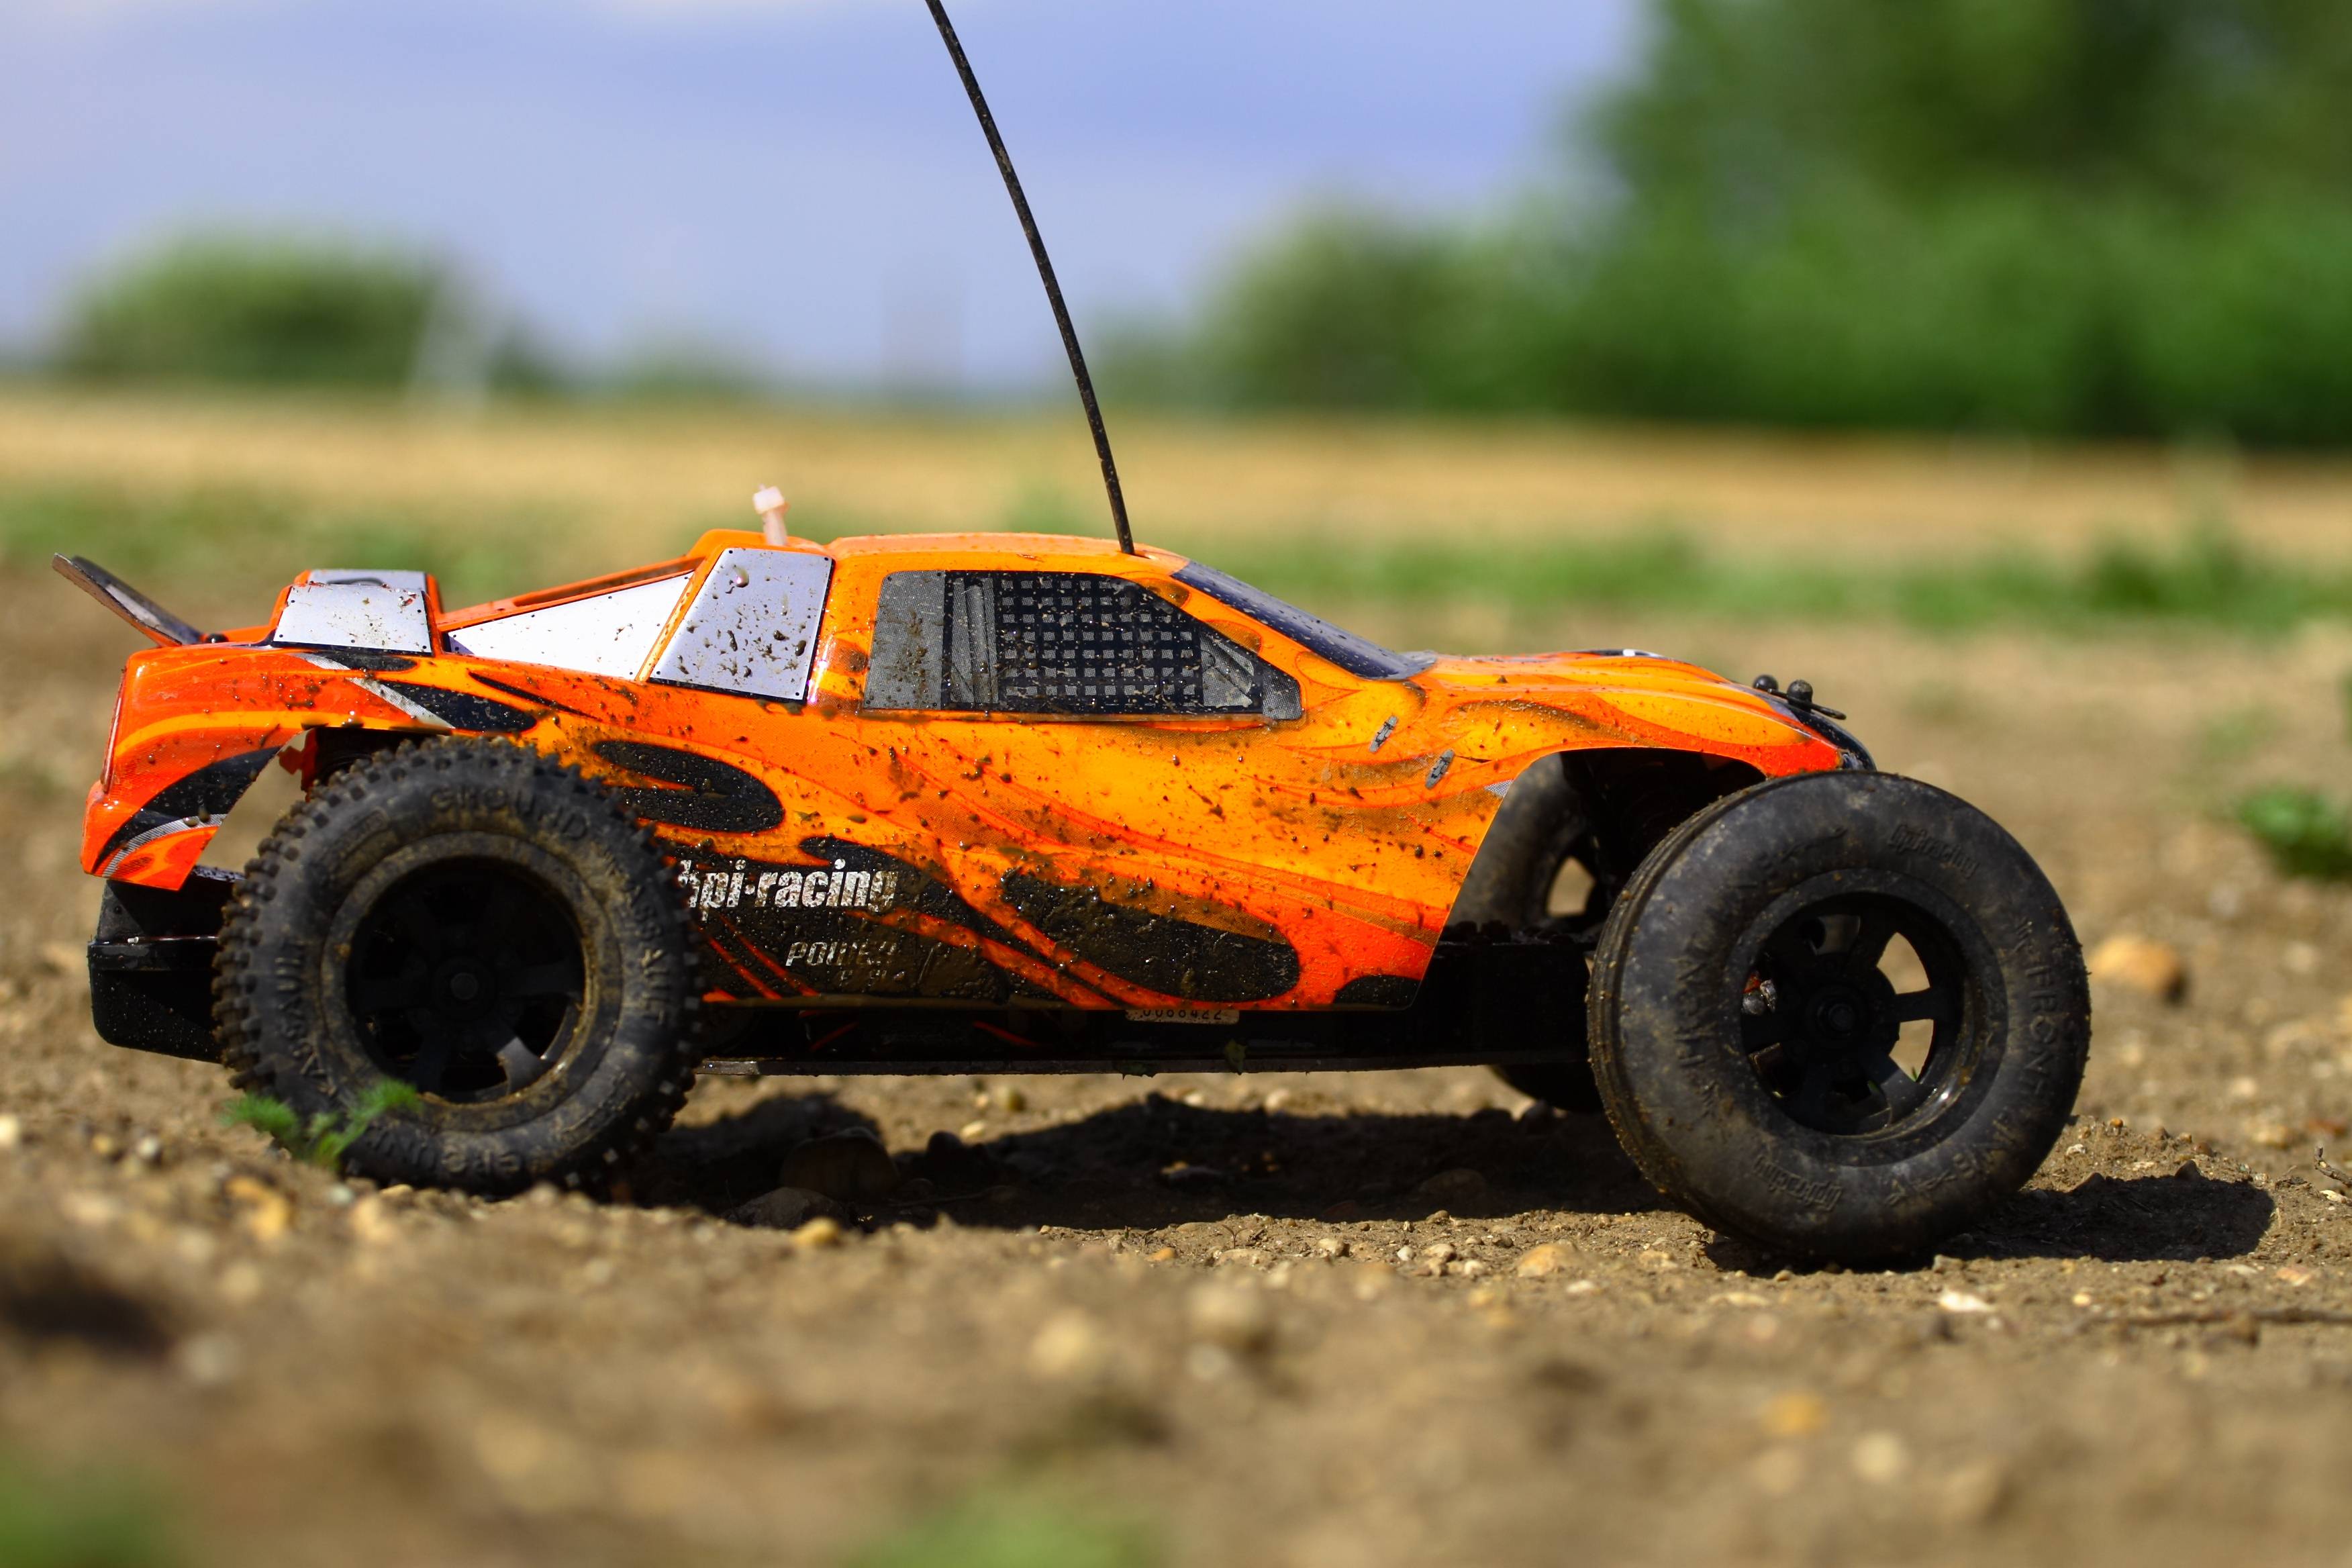
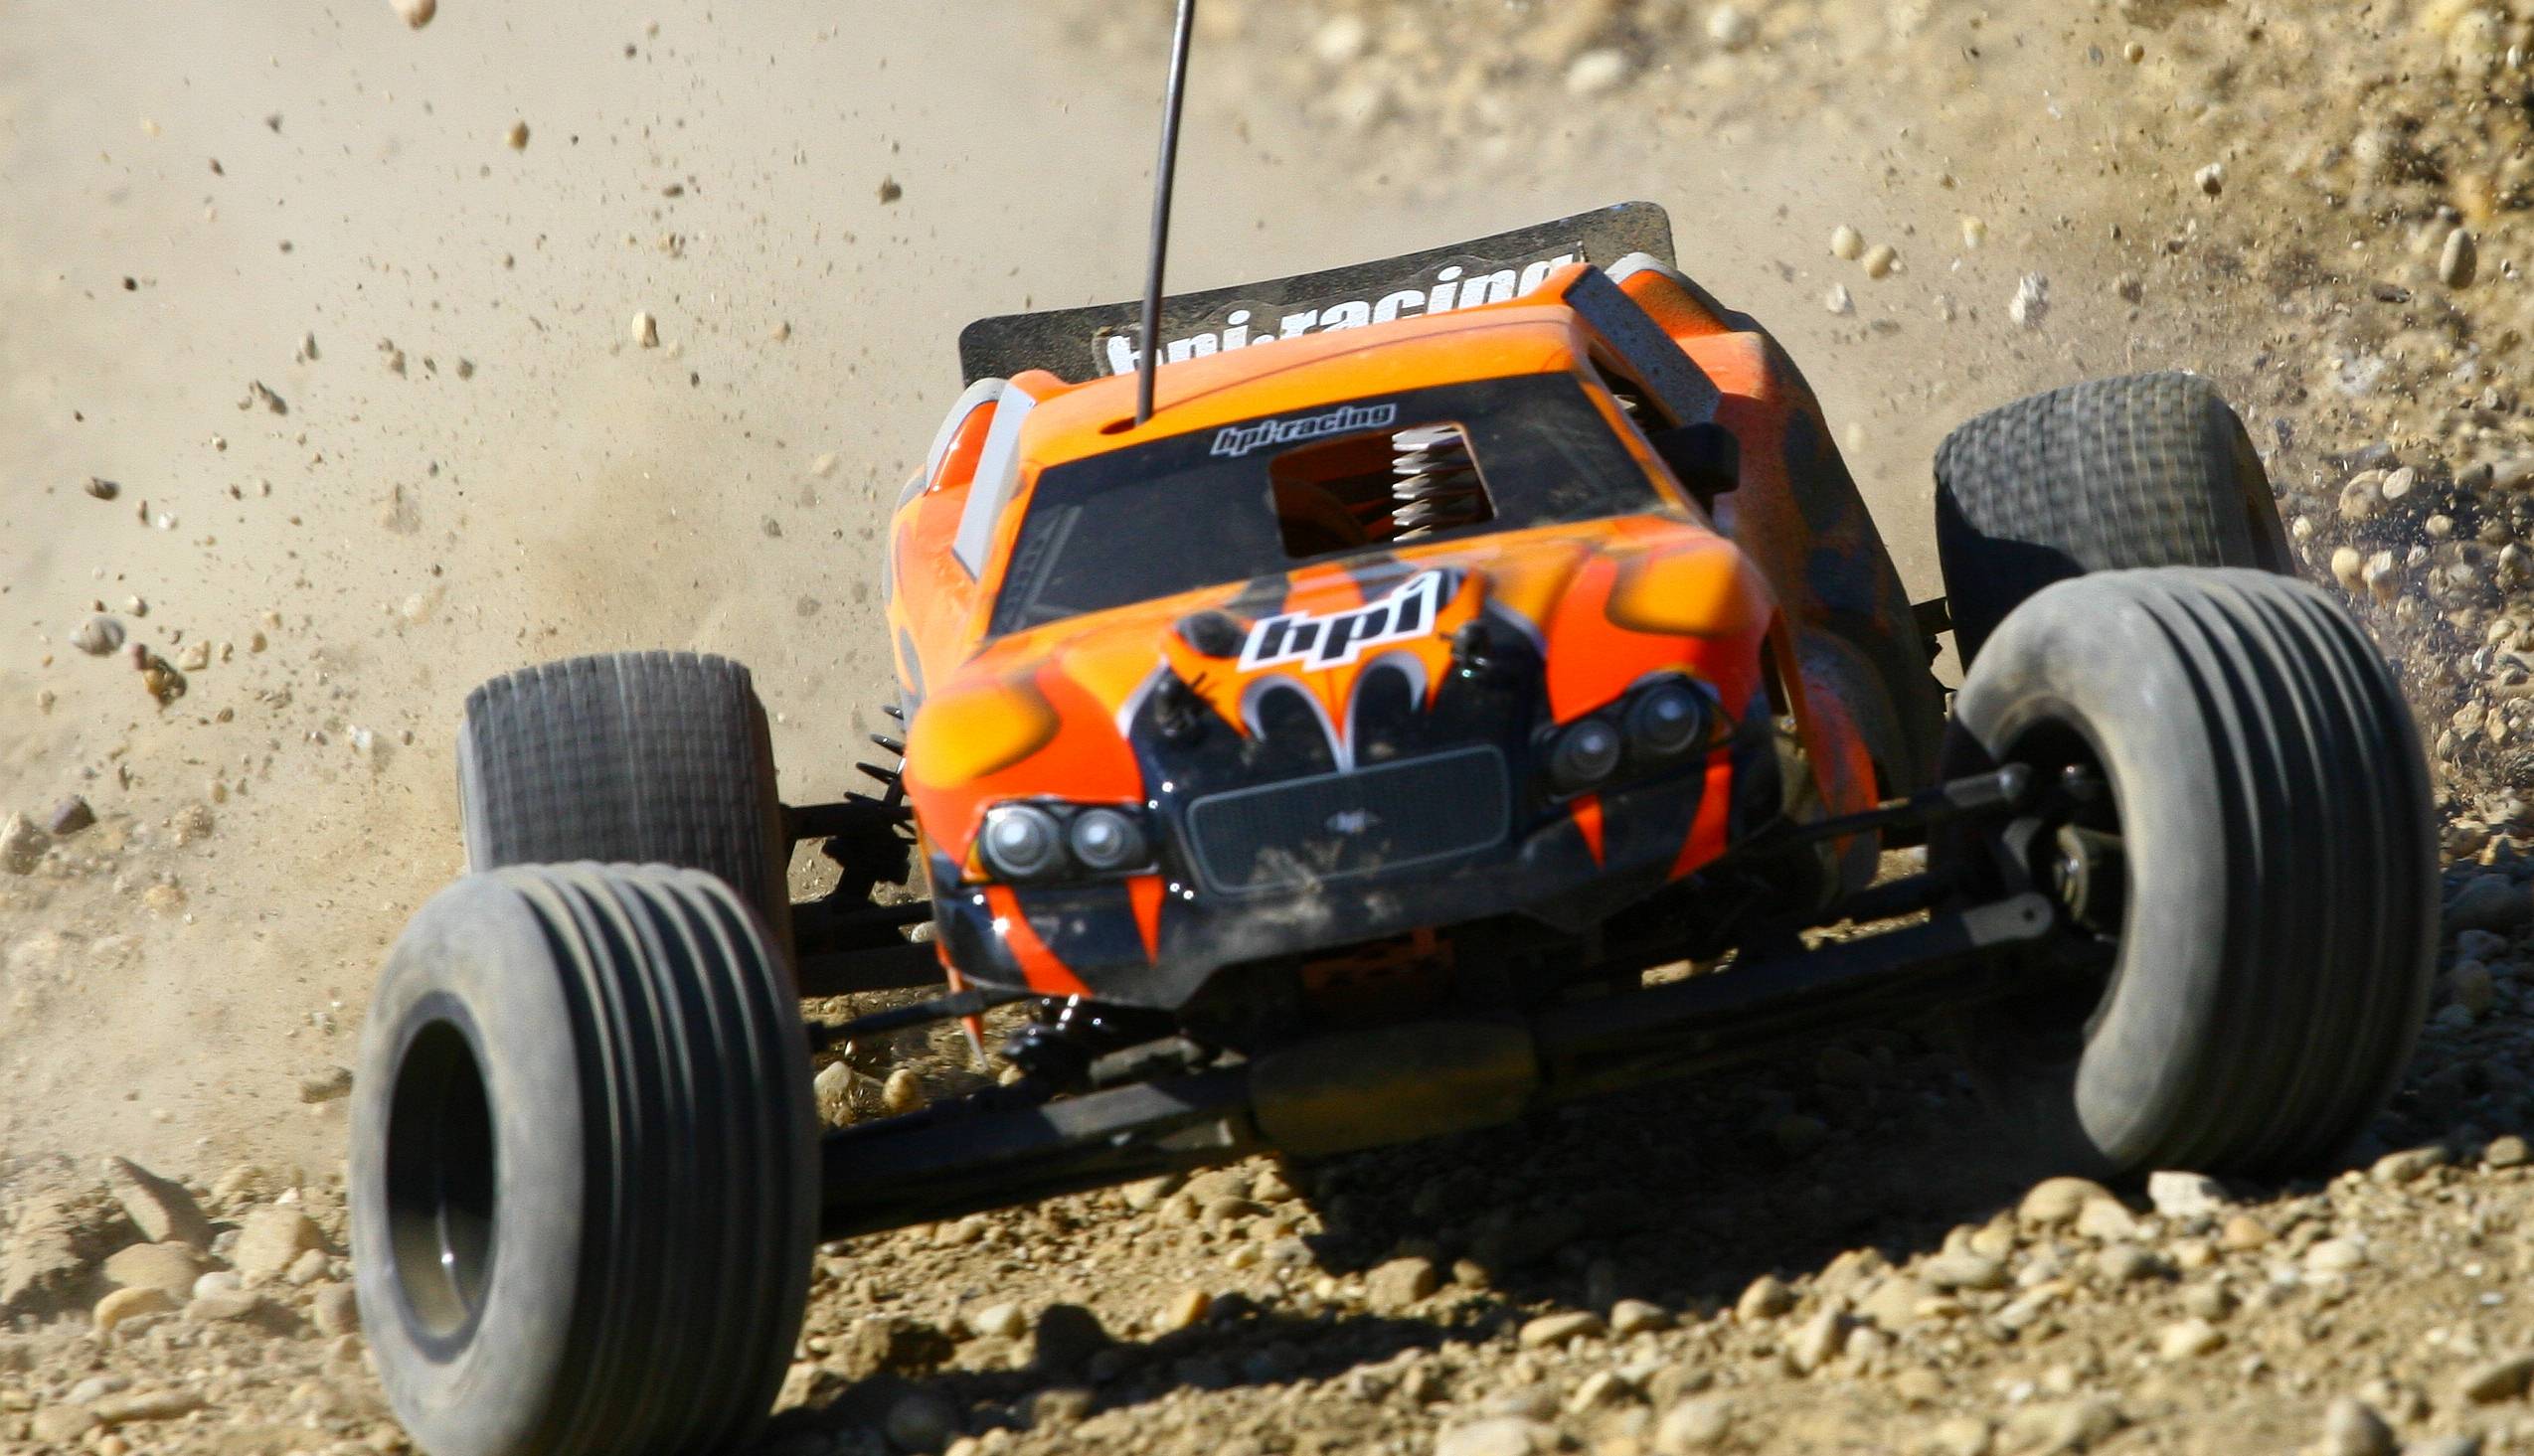
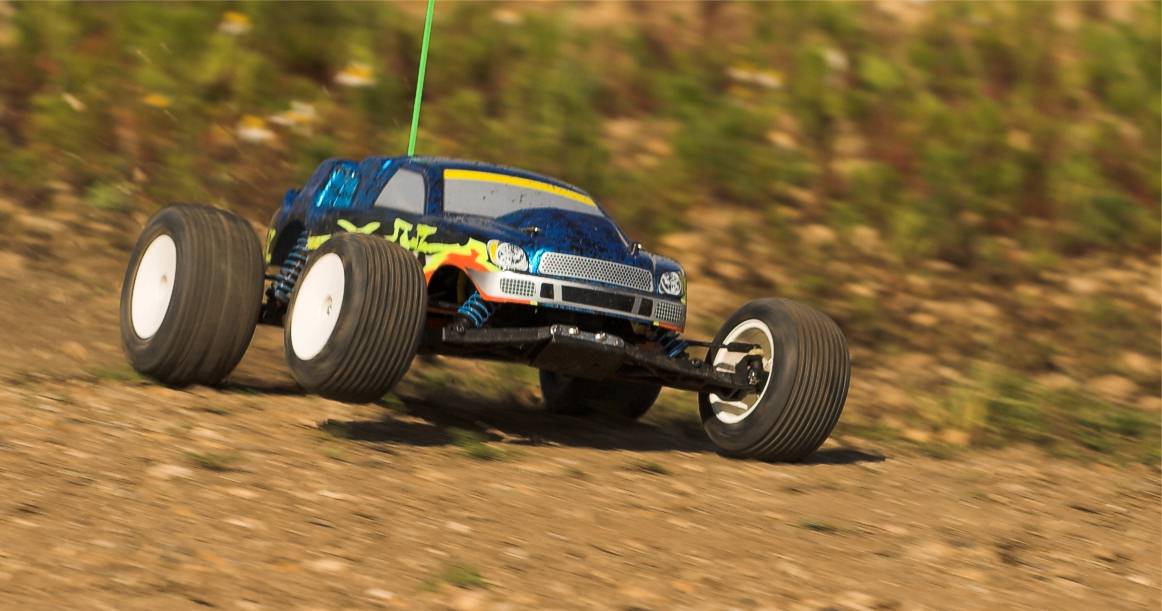
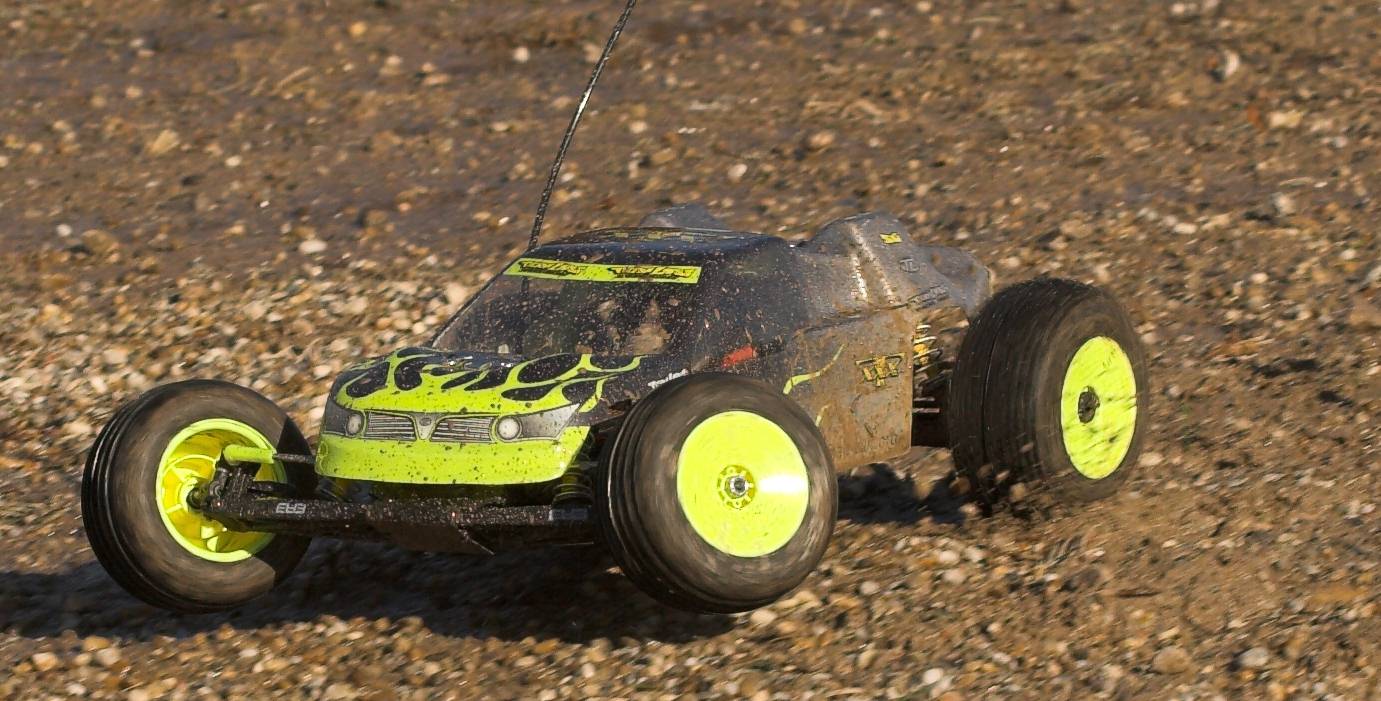
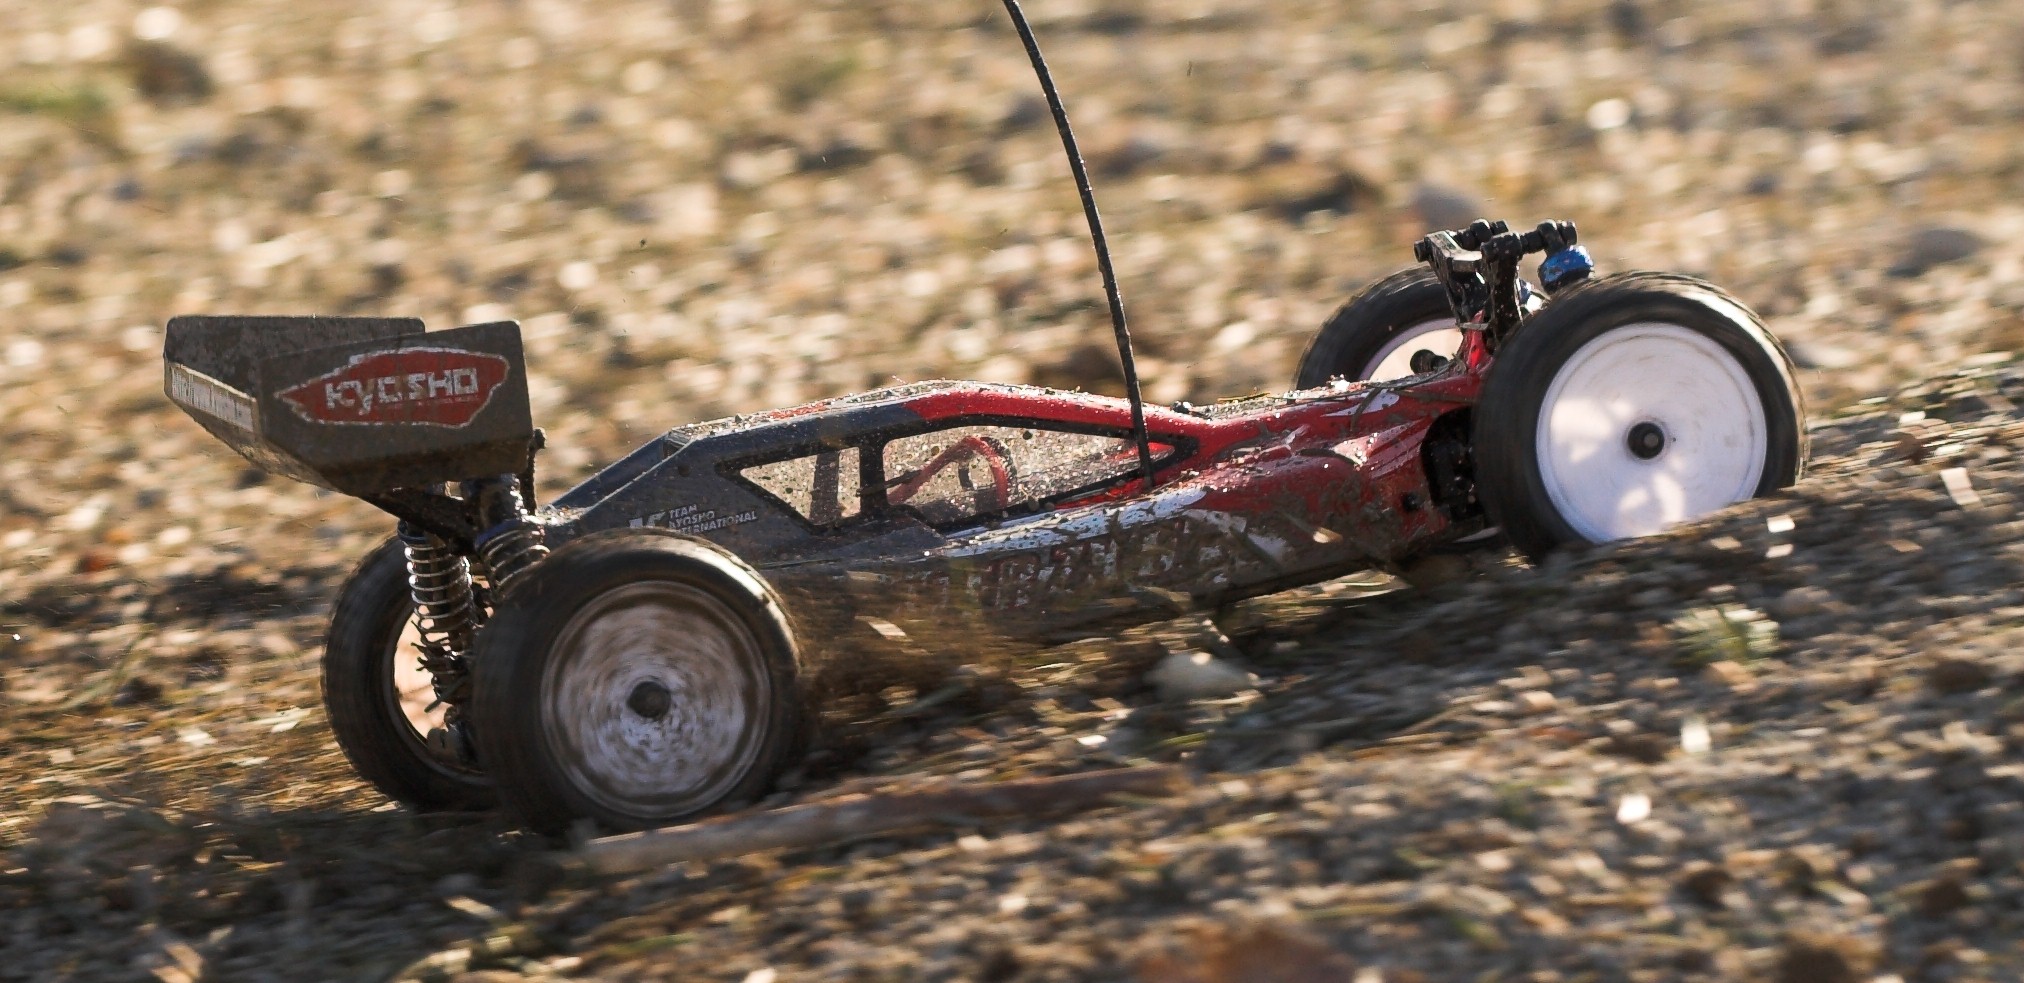
The following sample shots should be viewed in full size for the
best impression! (Click on the pictures to get an enlarged view.)
|
|
|
Photoshooting starts
- with the right equipment! |
|
|
|
Be it Canon, Nikon,
Sony, Pentax, Olympus or any other manufactorer - almost all of them
have DSLR bodies in their line-up, that are up to our needs.
But traditionally, Canon and Nikon are the dominant one's, when it
comes to the sports shooting business. Their professional grade
cameras have outstanding autofocus capabilities (among others) and
this is partly transferred to the lower grade models ot the semi-pro
and amateur class.
So if the camera will mostly see action/sports use, models of these
two manufactorers should get priority in the decision.
But don't forget that deciding for a manufactorer also means (third
parties excluded) choosing the particular lens repertory, in which
there are quite a few differences between Nikon and Canon.
The proper lens:
Even more important than the camera body (which are
quite capable even up from the 500-600 Euros range) is a
lens, that is suited for rc-offroad action-photography.
From experience, I can recommend a zoom lens with around
70-200mm of focal length for the typical 1,6 - 1,5 crop
cam. More range is always better, but it comes at a
hefty premium.
The lens focus mechanism should be driven by an
ultrasonic motor (USM, AF-S, SDM, SWM, SSM designation)
for a quick and precise focus lock. |
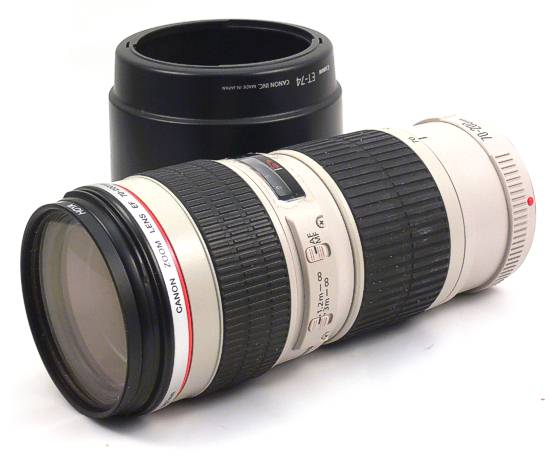 |
Contrary
to Nikon, (and most probably any other manufactorer)
Canon has a very attractive F/4 lens in the 70-200mm
range.
Canon's EF 70-200 F/4 L USM is substantially lighter
and more affordable than the F/2.8 lenses without
sacrificing neither optical quality nor focus speed.
Both are extremly important, since we'll often have to
rely on 100% crops (one pixel of the camera's sensor
translates into one pixel on your monitor) with our
quick offroaders. At this level of detail, any focussing
issues or optical flaws are mercilessly revealed.
The lens' smaller maximum aperture doesn't matter in
most situations: Our small models need a high
reproduction scale on the camera's sensor (close
distance, long focal length). This minimizes the depth
of field to a point, where it becomes moot. So after
all, the light gain of a more expensive and heavier
F/2.8 lens is of little practical use, especially at
short distances - but more on that for later! |
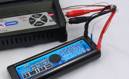
Another important
accessory in rc offroad action photography is a fast flash card - or
even better: some of them. Going by the 100% crop thingy explained
above, the picture format of choice should be (lossless) RAW, since
it doesn't suffer from in-camera JPEG processing with it's artifacts.
Pictures saved in the RAW-format take up more than twice to four
times of memory space than JPEGs. Add a continous shooting mode and
you can image the amout of data, that has to be processed and saved!
Under
normal circumstances, I take about 400 to 500 pictures
per shooting. Of course, there's a lot of junk in
between. But the camera's display is not sufficient in
assessing the sharpness of a picture. So I can only
delete pictures that were obvious misses, (grossly
blurred or some other shortcoming) and hence, clearing
the memory card becomes very ineffective.
What's more, examining pictures on location costs time.
Time, that may not be available at all! (Think of a race
with a tight schedule).
The bottom line: always carry enough memory cards with
you. 400 to 500 RAW photos take up to 4-6 GB of storage. |
|
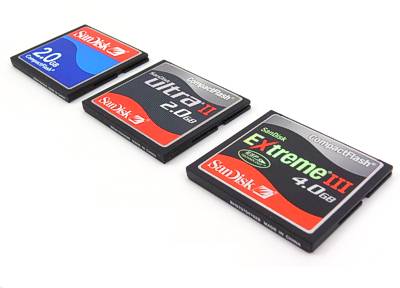 |
Memory cards are not
created equal!
4GB CF-cards range from 20 up to 80 Euros. (and perhaps
even more)
Apart from those el cheapo noname cards, that don't lend
themselves particulary well to storing your precious
action shots, the different price classes also represent
the card's ability to read or write data at a certain
speed.
Speedy cards can boost a camera's continous shooting
performance dramatically, since it takes lesser time to
empty the buffer, and your camera is ready for the next
bursts earlier.
It might not be crucial in "standart" photography, but
it may be all our nothing in the rc-car business! |
|
Memory cards with a "66x
speed" label (compared to the 150Kb/sec single speed
CD-rom) or a 133x mark (Sandisk Ultra II and Extreme III
in the picture above) work well with current camera
models. Slower cards increase the camera's buffer
clearing time, whereas faster 266x cards thwart the
storage interface of all but the highest end DSLRs. Such
cards are (yet) only useful in quickly transferring
large amounts of data to the computer - a very potent
card reader provided. |
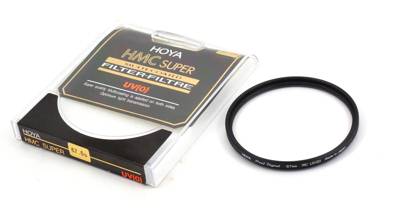
Last but not least, I
want to recommend a good UV-filter to you. It helps to protect the
front glass of the lens from the elements, and despite despite what
some purists might be telling, it doesn't deteriorate image quality
visibly.
Further more, no scratched or broken front element could justify a
theoretically superior image quality!
When buying an UV-filter,
be aware to get one that has at least a single, better a
multi-coated surface finish.
There are some
very cheap, uncoated filters around. They act like
ordinary window-glass, and the photos look
correspondingly, with reflections and low contrast all
around.
Good quality filters cost around 30-45 Euros. But
remember, this is hardly a tenth of what a good telezoom
lens would cost!
Of course, the filter has to be of the same diameter as
marked on lens barrel. |
 |
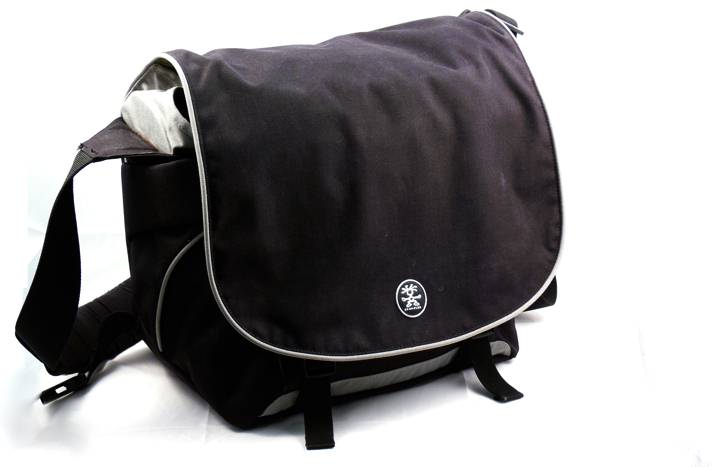
| A
filter can protect your lens - but to protect your whole
camera and equipment, it takes a good photo-bag!
Looking at the typical prices from 40 to much more than
100 Euros, it may be tempting, to throw the camera into
a backpack, that was last year's advertising gift. Of
course, you get one carrying handle for all your
equipment, but that's about it. Only specialised
photo-bags can protect your precious equipment from
bumps, dust and dampness. I recommend visiting
Taschenfreak.de (German language, but many
photos) for a large selection of photo-bags. |
|
 |
|
|
|
Just a few moments
before kickoff ... |
|
|
|
Slowly, the driver's
stand gets crowded and the track marshals prepare for the heat. The
first few engines start to roar at the remote bashing grounds -
those, who leisurely unpack their cameras now, have lost from the
get-go.
Photographing beside the track doesn't require very sophisticated
preparation work, but zero prep is a good bet for zero success -
notably, when you're new to this type of photography.
So in order to not get caught flatfooted, here are two little
checklists for you!
Camera:
- Battery full and
storage card empty?
- Preferrably
RAW-format selected?
(Alternatively, highest quality JPEG with white
balance set to "cloudy" works well, too)
- Continuous
shooting mode activated?
- Autofocus set to
continous/predictive? (AI-Servo, AF-C ...)
Lens:
- Autofocus engaged?
- No focus limiter
active?
- Protective filter
and lens hood mounted?
|
Almost all DSLR
cameras feature so called "scene modes". With a flip on the command
dial, you can tell your camera whether you're shooting at a party,
in the snow, fireworks or even at the Olympic Games (just kidding...)
Everytime I look at the tiny scene-mode symbols, I wonder myself: "How
could the camera know, what I want the photo to look like?"
Don't get me wrong here, those scene modes may be an absolute
beginner's guide to photography, but I recommend you to use the
camera's convential automatic exposure and the manual exposure mode
- like described below.
Some cameras can store
different aperature and shutter values for their
different modes. This is a fact that we take advantage
of in programming our own "scene modes". Instead of
selecting largely different aperture and shutter values
in various shooting conditions on the track, a quick
flip on the command dial will do the trick from now on.
- Manual Exposure (M)
Shooting manual requires the RAW-format, since
the exposure won't be dead on. This shooting mode
will be used as an allrounder. Set the aperture
value to one full stop below the maximum aperture (e.g.
F/5.6 on an F/4 lens. An F/3.5 - F/5.6 lens gets
F/8)
Shutter speed should be around 1/800 to 1/1600 of a
second - more on that for later.
- Aperture
priority
(A, Av)
In aperture priority, set the maximum (largest)
aperture possible. The camera will choose the
appropriate shutter speeds, that will be the fastest
possible.
With these setting, you're able to get tack-sharp
pictures of spectacular moments. The actions seems
to be frozen.
- Shutter
priority
(S, Tv)
... works just opposite to aperture priority: You
choose the desired shutter speed, and the camera
will select an appropriate aperature.
The shutter speeds should be around 1/320 to
1/640sec for nice panning shots and if you're
working at 200mm and above.
If your camera rests on a tripod or you enjoy a
stabilized lens, (or if you are working at shorter
focal lengths around 100mm) you can safely choose
1/160 to 1/250sec. Lower shutter speeds risk blurred
shots due to the nature of bumpy offroad-racing.
In any case, the shutter speeds will suffice to blur
anything but your subject and suggest a great sense
of speed!
Additionally, you
should take care of your cameras autofocus and
exposure-meter.
As written in the first sketchy checklist, your AF has
to be in continous/predictive mode to track moving
subjects. Take a look into the instruction manual, if
you don't know how to set this AF-mode. (It's called and
done differently with every manufactorer.)
Furthermore, you may have the chance to decide between "shutter
priority" (Don't confuse that with the automatic
exposure mode!) and "focus priority". Shutter priority
may have its advantages, but when shooting rc-cars, I
suggest focus priority.
On top of that, it's absolutely important to disengage
the automatic focus point selection and only work with
the center focus point - even though your camera's
manual may tell you otherwise.
(The camera's AF-system acquires and tracks subjects
on the basis of contrast. With all AF-points activated,
it may find higher contrasts besides your subject: Curbs,
pipes and stones are particulary good at confusing the
autofocus!)
Dealing with the right
metering mode, I suggest center weighted, as it usually
results in the best exposures with rc-cars filling a
good portion of the viewfinder. |
Now, your camera may
be ready for duty - but you are not! Take a look around the
track or area where you're going to shoot: Good positions to take
action-photos are corners and turns that are in between two longer
straighter: You get speed, you get corner action and overtakes - and
you can even get the consequences of late-braking from the more
reckless ones ;-) . During a bashing seassion away from the track,
you should coordinate with the drivers - and in any case, you should
obey a minimum safty distance of about 3-4 metres for 1/10, 4-5
metres for 1/8 and more than 5 metres for the really big guys. (Official
events may even impose stricter rules on this.)
Sitting or lying on
the ground - preferrably with a camping mat underneath, you're ready
for the action to start!
|
|
|
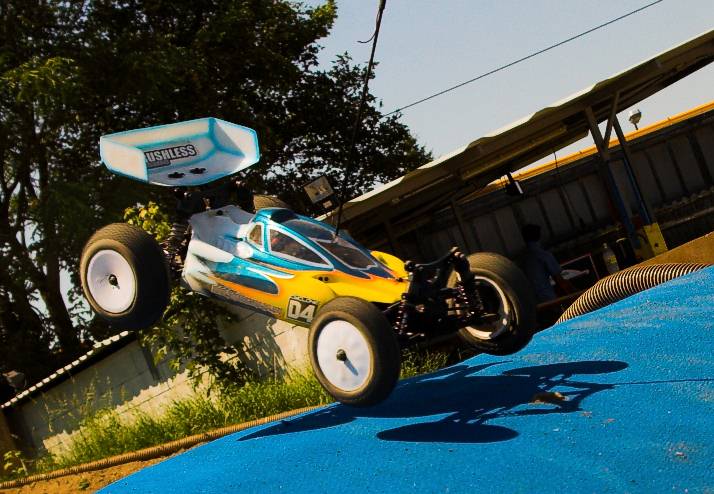
Ok, Once Again: Ready
- Set ... Go? |
|
|
|
Yep, but don't press
the shutter yet! With the exposure modes set, you need to choose an
appropriate ISO-sensitivity for your shooting conditions.
In aperture-priority (with the maximum aperture set) you should at
least get an 1/2000 sec exposure from 1/10 buggies on the starting
grid. With stadium trucks or even bigger IC models, the shutter
speed can be somewhat lower at around 1/1600 or even below. As you
set the according ISO-value, all other shooting modes, we've set up
before, are dialed in too.
Don't be afraid of high ISOs: today's DLSR cameras can deliver
almost flawless picture quality at ISO-400 and ISO-800. On an
overcast day, don't hesitate to dial in ISO-1600, though besides,
you can decrease your shutter speed to 1/1300 or below.
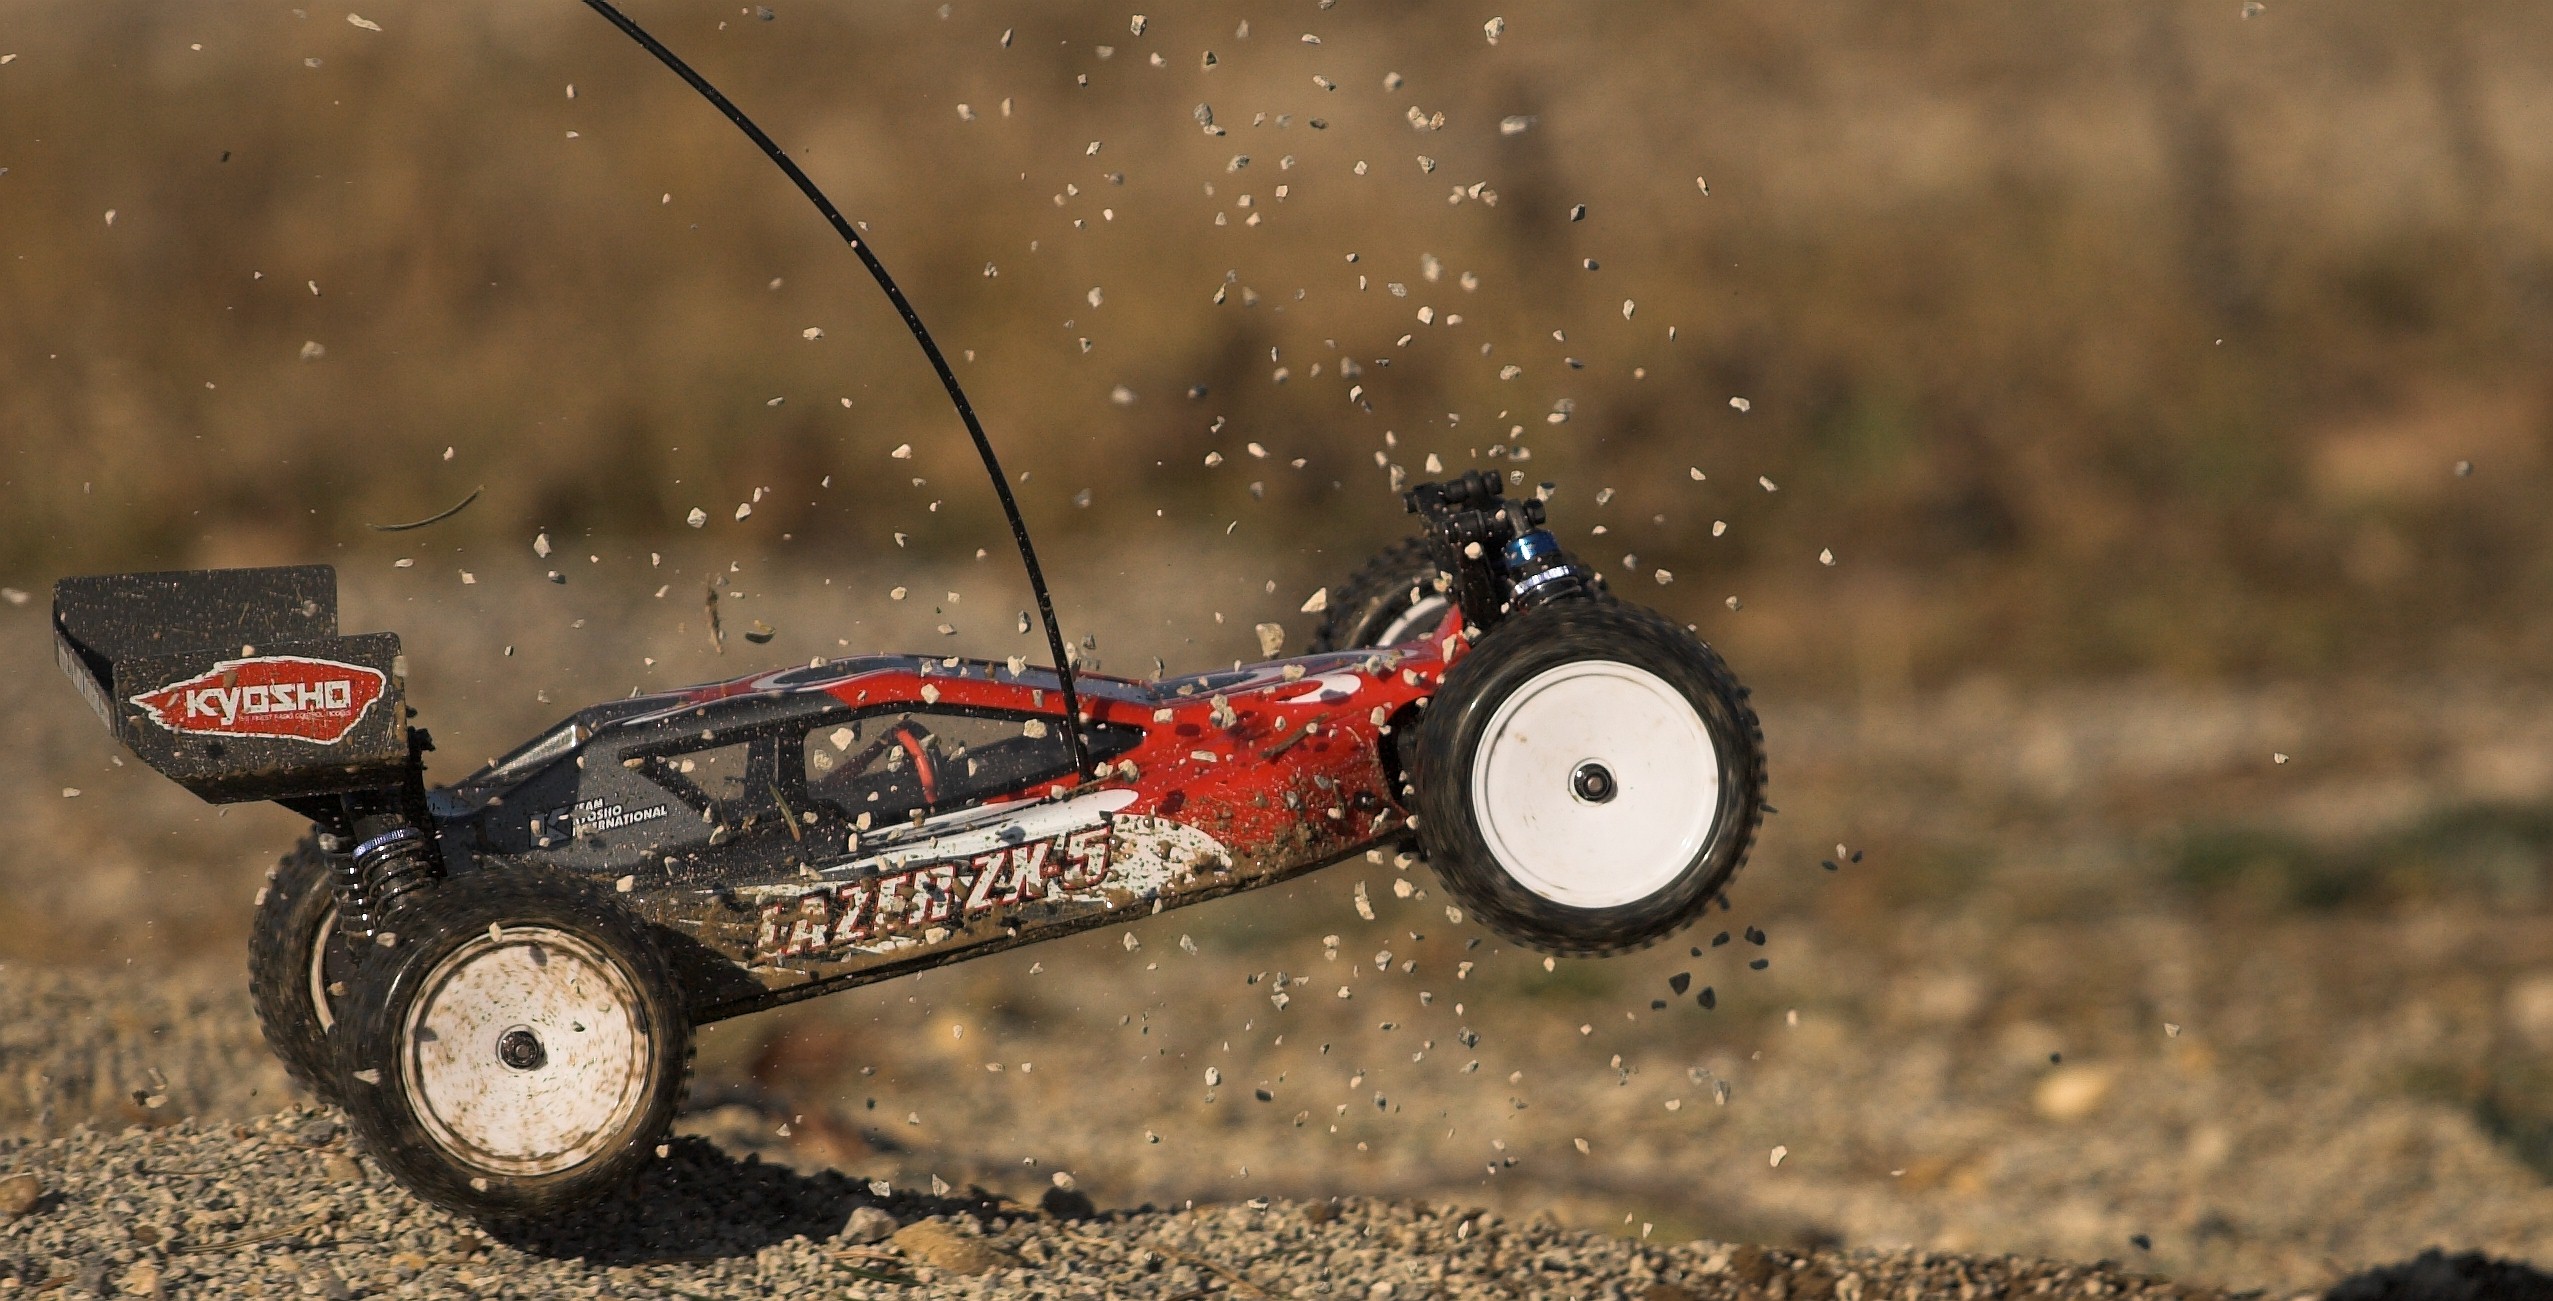
Tracking RC-Cars
Physics give us a hard time with rc-car action
photography. We have to work with large reproduction
scales on the image sensor to get really good results.
This means large focal lengths combined with a close
distance to the subjects, which doesn't prevent them
from rushing past at 30 to 50 km/h. Though this may not
sound that impressive in real world terms, with a
glimpse through the viewfinder under these circumstances
it appears as if we'd be shooting insanely fast
250-500km/h offroaders on an 1:1 scale!
RC-car action photography
hence requires superior focus on your subject - and I
recommend to do the formal composition on your computer
afterwards. (With today's high pixel count DSLRs,
there's always some space for cropping.
It's far more important to keep the center AF-point over
your subject, which gets more difficult, the closer the
rc-car approaches.
To avoid this, beginners tend to keep their subject
small in the viewfinder. (e.g. zooming out on approach)
While this is effective for tracking fast subjects, it
also cancel out the chance for real big and impressive
action-shots. |
|
|
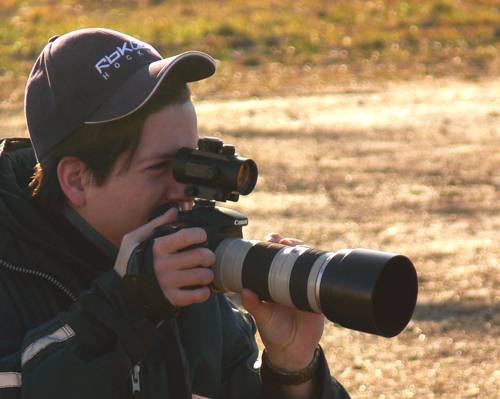
To get "the best of
both worlds", you can use a red dot sight on your
camera's hot shoe.
This handy device (borrowed from the sports shooters -
cheap models will do just fine for our needs) projects a
red dot on its front glass that appears to be
superimposed on your subject.
So you can use the red dot sight as an alternative
viewfinder with a much broader field of view, while at
the same time working at the longest focal length of you
lens.In order to
calibrate the red dot sight to your camera, you should
point the center AF-mark on a distant object (e.g. a
spire) and adjust the |
sight's winding and
elevation accordingly, so that the red dot points at
exactly the same position.
Working with an RDS requires some practice, too as you
arbitrarily choose your focal length. Additionally, the
RDS is about 10 centimetres off the lens' axis, so you
should always keep the red dot slightliy above your
subject. It may feel tedious in the beginning, but I'm
sure you'll quickly get the hang of it!
Red Dots also greatly
help in poor lighting conditions (more on that for later)
or when you're distracted by the viewfinder blackout
during continuous bursts. |
For the basics below,
I want to rely on viewfinder-photography. The illustrations
represent a view through the finder with emphasis on the main
subject's scale. The procedure lends itself to panning shots as well
as stopped motion shots. (according to the settings we took for
aperture and shutter priority modes)
Furthermore, the drawings apply, no matter which focal length you're
using - you just have to get closer or farther away from the action.
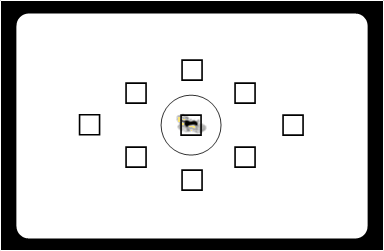
Phase
1: Decide on Your Subject.
You should decide on your subject as early as possible,
even though it hardly appears larger than an AF-point
mark through the viewfinder.
Spontaneity might be a virtue in general - here, it's
not. |
 |
Phase
2: Engage the Autofocus
As soon as your subject grows clearly bigger than the
central AF-mark, it's time to engage your cameras
autofocus.
Though there's usually a high chance of many consecutive
in-focus shots, it doesn't make sense to take pictures
yet, since your subject would merely be 400 to 600
pixels wide.
Furthermore, you lose some creative DOF control over the
distance, and dust in the air decreases picture quality
substantially. |
 |
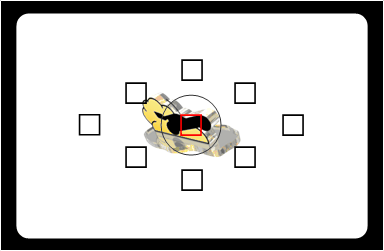
Phase
3: Concentration is the Key!
Phase 3 is paticularily delicate since you have to keep
your center AF-point on the subject at all costs -
otherwise, the focus will get caught in the surroundings.
Your subject still isn't large enough through the
viewfinder, so little unexpected movements on the
driver's side and the photographer's not-careful-enough
reaction can throw the subject off. |
 |
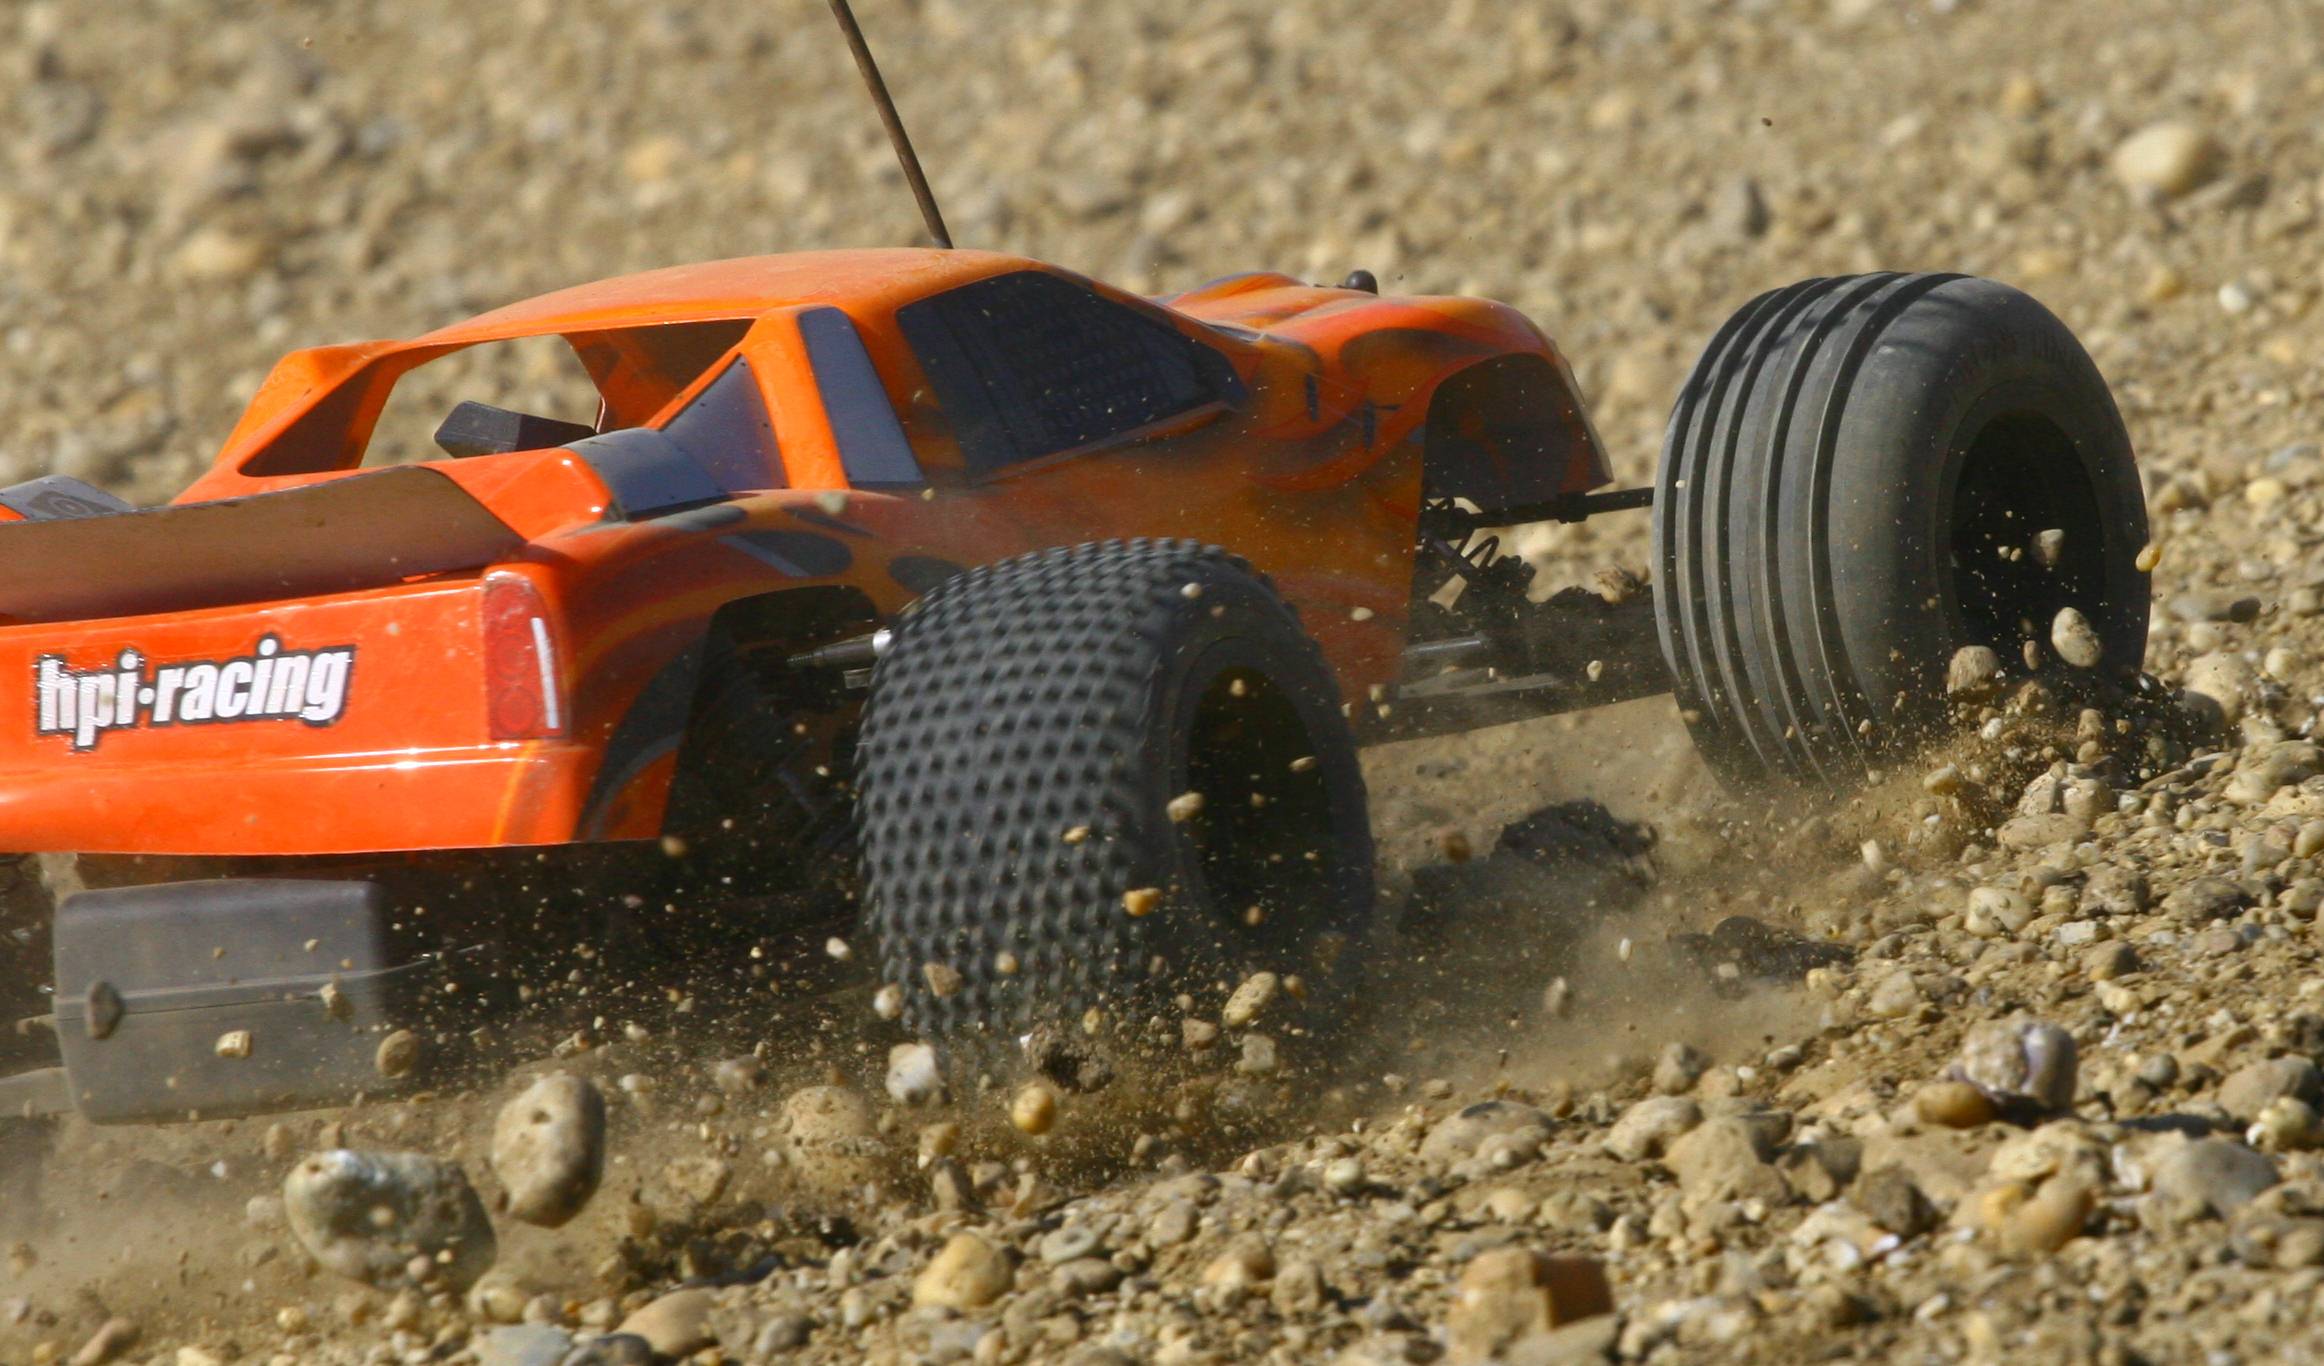
Phase
4: Getting Serious
With a camera capable of 5fps bursts, your subject now
is close enough to safely fire away - especially if
you're shooting across from the apex of a turn.
This will get you 2-3 good pictures of a reasonably
sized subject. |
 |
Phase
5: Just the Right Moment
As the rc-car closes in, it's getting really difficult
to keep it in the viewfinder frame, since there are only
a few centimetres (in real terms) left at the borders.
Additionally, close subject tracking is most difficult
for the camera's autofocus, and manufactorers' limits on
tracking speed are exceeded on a regular basis. So,
prepere for lots of digital scrap, but hang on! Sharp
shots at this distance are one of the most impressive of
our favourite offroaders! |
 |
Although these five
phases are quite leasurely described, at most a few seconds pass by
between phase 1 and phase 5. Between the critical phases 3 to 5,
it's only a snatch. So, the process above almost has to become your
second nature - and that means practice, practice and even more
practice. I understand that this doesn't sound very uplifting - but
your ever ever improving results will!
A Small Excursion
to Indoor Photorgraphy
Due to numerous requests, here are a few lines on one of
the most difficult subjects: indoor sports photography
using large reproduction scales
- Flash
photography
Photographing with a powerful external flash, it's
important to understand that you may need high-speed
synchronisation when your desired shutter speeds
exceed 1/180 to 1/250 of a second. (refer to your
manual on this one)
High speed synchronisation greatly reduces the
flash's guide number which cancels out most creative
uses of the flash. But you may still use a diffuser
to soften the harsh flash light a bit.
If you're comfortable with the lower shutter speeds
up to X-sync, you should set your camera to
synchronisize the flash with the second shutter
curtain which creates nice motion tracks under
sufficient ambient light. (I'm not very fond of
flash photography, so I could only demonstrate this
using my onboard flash and a microsizer ;-) )
-
Available-light action photography:
The term might sound funny, but it gets even wierder
as tiny rc-cars are involved. With available light
photography, you'd normally use a very fast (fix
focal length) lens with a maximum apertue of F/1.4
to F/2.0. Apart from these lenses costing a fortune
in the 200mm range, the big aperture is of little
use when it comes to rc-cars, since it thins out the
DOF to a point where only a tyre or a shock tower
would be in focus with the rest grossly blurred.
At F/4 or, if you're farther away and accordingly
equipped, F/2.8 the DOF won't be a problem, but now,
the ambient light level is!
To compensate, most DLSR cameras offer ISO
sensitivities of up to 1600 oder 3200 (and even more
on the current high end models)
But even ISO-3200 sometimes isn't enough. Your only
chance is to underexpose the pictures 1-2 f-stops
and - shooting RAW of course - push them prior to
the JPEG-conversion in your RAW-converter of choice.
This effectively creates ISO-6400 and ISO-12800 with
prominent noise - but hey, they're good for small
prints and web use.
Additionally, no flash picture can under these
circumstances capture the mood of the original
scenery.
The following sample shots should demonstrate this,
though "offroad" ist a bit tentative here ;-)
All pictures were shot using a red dot sight,
because the viewfinder through an F/4 lens is too
dim for such things.
|
|
(Pictures
taken from the Vienna Toy Fair 2007 - more pictures
available here!) |
|
|
|
Dirty Arts Deluxe |
|
|
|
As you master the
basics of rc-offroad action-photography, it's about time to turn
towards the artistic and aesthetic aspects of the matter. Now it's
shouldn't be your only goal to shoot technically good photos. You
should aim to do photos, that are emotionally stirring - at least
with us rc-enthusiasts!
The following pieces are ment to inspire. They should encourage you
to experiment on your own. Do not understand them as a "how-tos",
because they are not. Instead, be creative and develop your own
style!
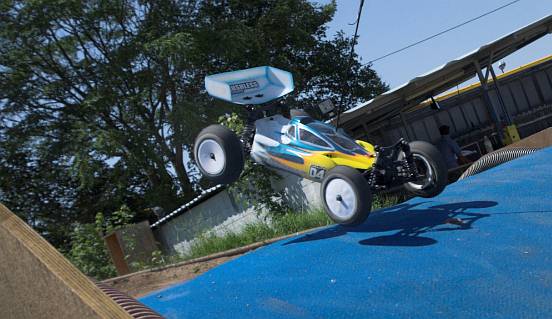
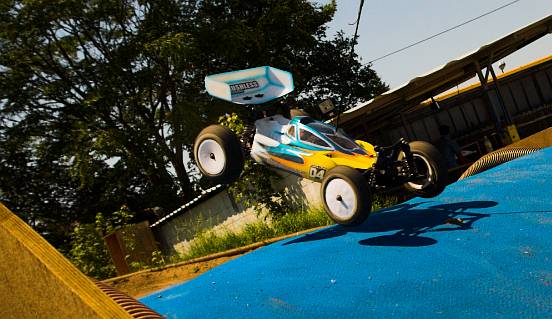
The DOF-Game
One of the major differences between DSLRs and digital
fixed lens compact cameras is their relation to the
depth of field. Whereas compact cams usually have a very
large DOF, it can get quite shallow with the bigger
imaging sensors of DLSR cameras.
To further enhance the vivid impression, an out of focus
foreground can be added to the picture - a staple of
almost any book on photography. |
|
|
|
This can be carried to
extremes, when the main subject itself is partly out of
focus. The amount of blurring depends on the
photographer's likings - here are three examples from
moderate to extreme. |
(Click on the
pictures for an enlarged view!)
|
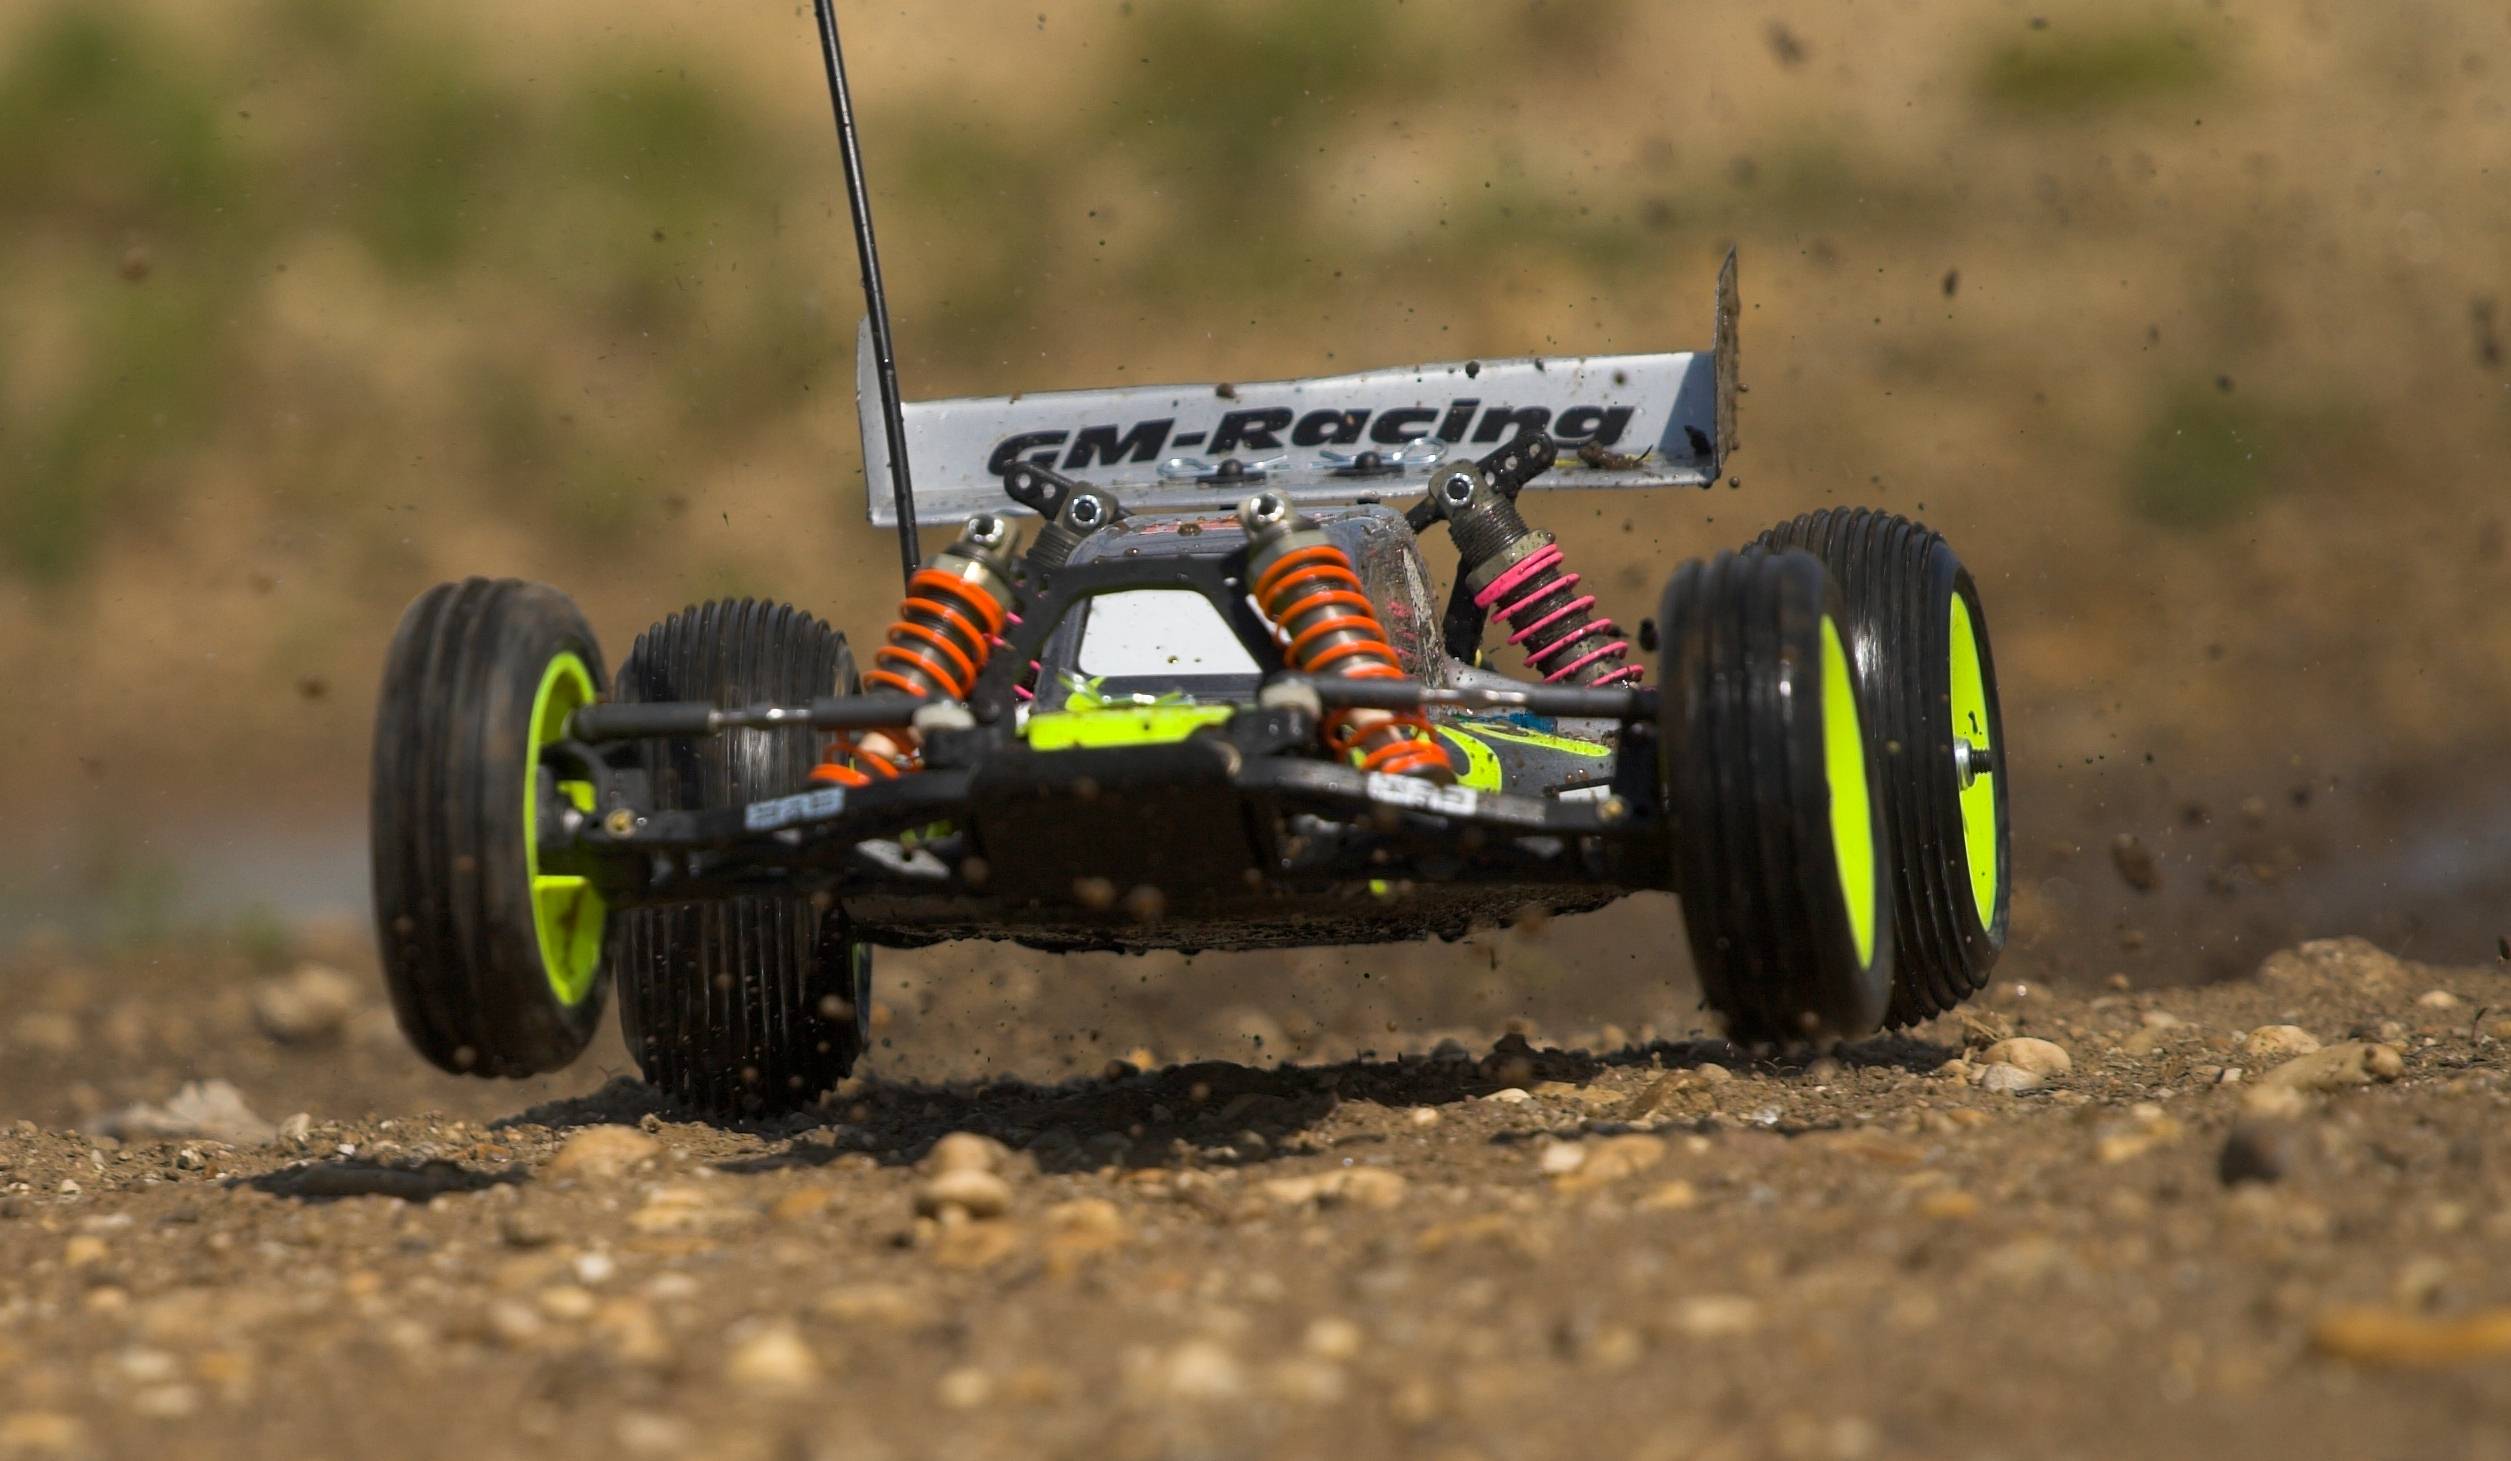
An rc-car speeding towards
the photographer may look may look more striking if it
enters the front DOF-border instead of leaving the rear
one - as if it is trying to push the DOF along.
Consequently, it's just the other way round when the
model car is moving away from the camera. |
Depth of field and
its position relative to the main subject is always going to be
a design element and hence is implicitly used in the following
examples.
Dynamics and
Statics Fused
High shutter speeds can freeze almost any motion which
results in spetacular pictures, that we could never
percieve first hand with our own eyes.
But as any motion in a shot is stopped, the whole
picture starts to look quite unnatural, sometimes maybe
even feeble.
To combat this, you'll have to carefully select a
shutter speed that stops most, but not any motion going
on in a paticular scene. Here are three examples that
retain some motion - sometimes subtly, sometimes more
obvious. |
(Click on the
pictures for an enlarged view!)
|
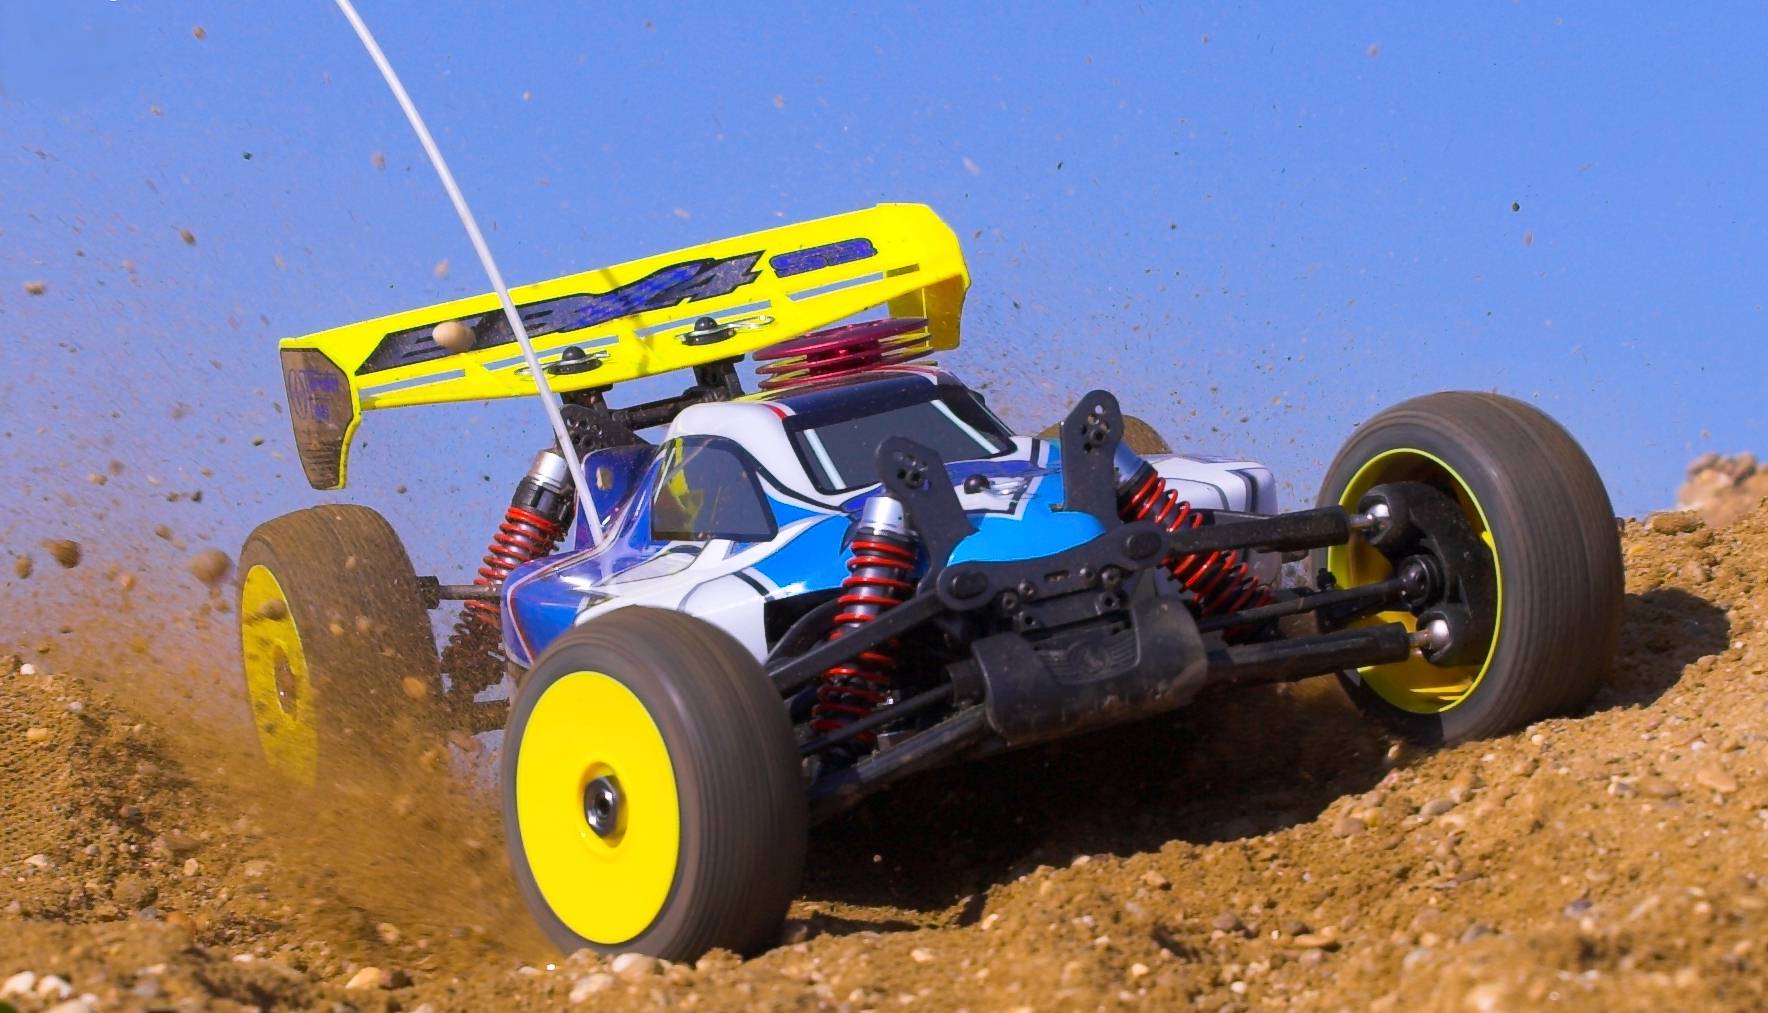
Panning shots get
boring after some time - at least those "me too" shots: Rc-car in
side view, with everything else smeared, suggesting the surroundings
move very fast. Or wait, could it be the offroad-racer that is
moving?
Tilted Motion
Tracks
Motion smearing that is of a different direction to an
rc-car's percieved motion or at least not parallel to
the picture's borders have a lot going for it.
But technically, it's a lot harder to complish as the
speed needed to pan along with the subject is reduced.
However, slower shutter speeds aren't always possible
due to the bumpy nature of offroad-racing.
So those kind of shots work best on high speed straights
or during drifts. |
(Click on the
pictures for an enlarged view!)
|
|
... or one could simply
tilt the camera - which in conjunction with an inclined
incidence of light results in really trashy looking
offroad-action! |
(Click on the
picture for an enlarged view!)
|
Now for something
totally different, though even more important:
Perspective Magic
The shots below represent almost the same scene -
although with a dramatically different impression. |
|
|
The Magic, that grants
picture two such a great sense of depth is called "Wide
angle". (in this case, 28mm equiv. but cropped)
Up until now, we agreed that the best focal length is
your lens' maximum focal length. But whenever your
subject seems lost, hanging in the air without reference
points, wide angle shots restore these references and
gently exaggerate proportions.
Wide angle shots aren't
technically demanding on your camera. Just pre-focus on
a point, your subject may pass. A large DOF thanks to a
short focal length (and maybe even a small aperture)
helps in covering up minor focus issues.
However, impressive
wide angle shots are dangerous to take - please read on
at the right! |
|
Safty first! |
(Relatively)
tiny RC-Cars require a very close shooting
position to get a big image. In fact, you
have to get much closer than a resonable
safty margin would call for. (sometimes
closer than half a
metre, to be precise..)
Additionally, the wide field of view
distorts the perception of speed, and with
the camera right at your eye, there's much
more at risk than your equipment.
NEVER do such "stunt-shots", until you're
really comfortable with wide angle lenses,
your shooting locations and the drivers
involved! |
|
Closing this little bag of tricks,
things get technical again: I already recommended shooting in
RAW-format serveral times earlier. As you may know, RAW has at least
16 times more picture data than plain JPEG. You'll hardly notice
this impressive amount of additional data, until you really work
with RAW-pictures: Without (relevant) loss of quality, it's possible
to fine tune the exposure, accentuate highlights/shadows or ...
tweak the white balance!
RAW-Power
Shooting with the "automatic white balance", your camera
will always try to show white things as white - shifting
any other color accordingly.
But what, if a scene doesn't include anything "really"
white? Let's take a sheet of paper for example. In the
light of the afternoon's sun, we'd still call the
paper's color "white", though we understand that it
looks more yellowish - in this paticular case.
A camera doesn't feature such a dual chromatic adaption,
so it will always try to render "white" as white,
unaffected from the actual illumination.
This can lead to dull images with poor color saturation
(compared to the visual impression) despite blazing
sunshine.
Shooting JPEG, you can always dial in the "cloudy"
preset white-balance. But the RAW-format permits you to
fine-tune the white balance on your monitor - obviously,
with even better results! |
Let's have a look at the
last two pictures again: First, that's how it came out
of the camera using AWB. The second one got a boost in
white-balance up to 7000K (Kelvin, color temperature)
Trick question: "Now which picture gets the mood of
a hot summer afternoon better across?"
The
AWB-guess results in really pale, bluish colors, whereas
the fine-tuned RAW-picture brings the scenery to life.
Using JPEG, this wouldn't
have been possible without quality losses. |
|
|
|
|
Closing
Words |
|
|
|
I hope you enjoyed my article on "large size" RC-offroad
action photography! This type of photography is lovely and thrilling
at the same time. And even though the required camera and lens setup
will hardly cost less than about 1000 Euros, the results are
absolutely rewarding, no matter if they're used as desktop
background, as A3+ prints to decorate your hobby room's walls or as
web posters. RC-offroad action-photography means taking pictures of
our model racers in a way, that we can't percieve with our own eyes.
And this is, what makes this subject such a special aspect of our
hobby - try for yourself!
Text and pictures by
Aaron Banovics
This article has been published at
www.offroad-cult.org
on 05-02-2008.
Aktuelle
Fachartikel von offroad-CULT:
| |
|
|
Das große Bürstenmotor 1x1: Für alle, die sich von
der Brushless-Mania der letzten Jahre nicht anstecken
haben lassen und noch immer mit Bürstenmotoren unterwegs
sind, präsentiert offroad-CULT einen
umfangreichen Pflege- und
Wartungsguide! |
|
|
Die neue Akkutechnologie Teil 2: Lithium-Polymer-Zellen
in schützender "Hardcase" Kunststoffverpackung schießen
zur Zeit wie die Schwammerln aus dem Boden.
Wie man diese sicher am Balancer laden kann, zeigt
der offroad-CULT Artikel:
Hardcase-Lipo-Balancer-Ladekabel
im Eigenbau! |
|
|
offroad-CULT über die
DIRTY ARTS -
was wohl dahinter steckt?
INTERNATIONAL RELEASE available
here! |
|
|
Die neue Akkutechnologie ist
da! Lithium-Polymer-Zellen bieten hohe Leistung und
Lebensdauer bei extrem geringen Gewicht.
Wie sich diese Vorteile am besten im Offroad-Modell
ausnutzen lassen, was dabei an Sicherheit zu beachten
ist und ob die Resultate
den Umstieg rechtfertigen steht im
großen Lipo-Guide! |
| |
|
Der
CULT-Buggy von Mad Max! Alles über die Idee, den Bau
und die Fahreindrücke zum Piranha P2 gibt es
hier
INTERNATIONAL RELEASE
available
here! |
| |
|
(Action) Fotografie im
Modellsport! Ein dreiteiliger Bericht
über Kamera-Basics, Aufnahmetechniken und Tricks für
dein RC-Car als Poster an der Wand: Bildfüllend, Scharf
und in Action!
Für alle mit Kompaktkameras ...
INTERNATIONAL RELEASE
available
here! |
| |
|
Das
Kugeldifferential
ist ein geselliger Zeitgenosse, immerhin trifft man es
vor allem in Elektromodellen sehr häufig an. Aber wie
funktioniert so ein Kugeldifferential überhaupt? Was
sind "Keramikkugeln"? ... und wenn's Probleme macht?
hier weiterlesen!. |
noch mehr
Fachartikel...
|
|

|